DO YOU HAVE ANY QUESTIONS?
THANKS!
REQUEST HAS SENT
WE WILL CONTACT YOU SHORTLY


SERG TOMAKH
DEVELOPMENT MANAGER
Or contact us via email hello@omegarender.com

3D RENDERING WORKFLOW: AN OMEGARENDER GUIDE
HOW WE WORK
WHY WE UPDATED THE WORKFLOW
Our updated workflow for 3D rendering services is designed to make the process more transparent, structured, and predictable for you. By breaking production into clear stages, we ensure that every key decision — from composition to materials — is approved in advance, eliminating unexpected changes at the final stage.
This approach allows you to focus on one aspect at a time, making feedback easier and more efficient. It also ensures that the final result closely matches your expectations, while keeping the process flexible and adaptable to your needs.
If a variety of design options is needed, we can introduce this variability at the specific stage where it brings the most value—rather than applying it across the entire process.
STEP 1
Discovery
Tell us about your project, including your vision, references, timeline, and budget. This stage allows us to define the scope and align expectations before production begins clearly.
Client focus
Project vision, references, timeline, and budget details.
Approval milestone
Approved brief and aligned scope.
STEP 2
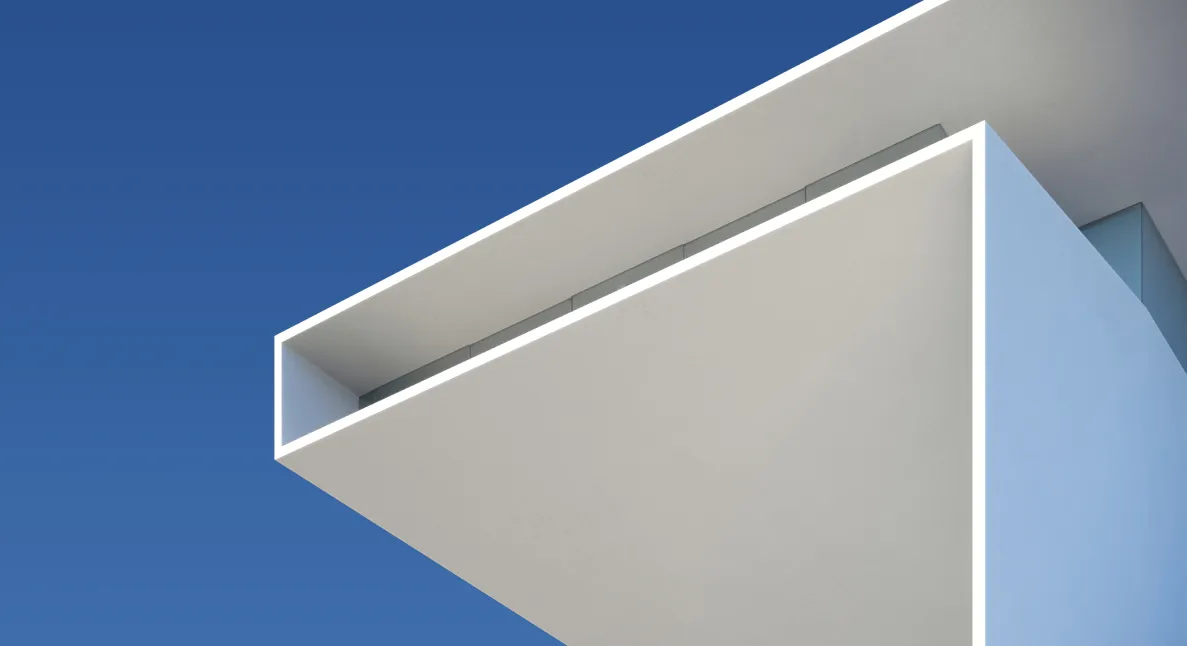
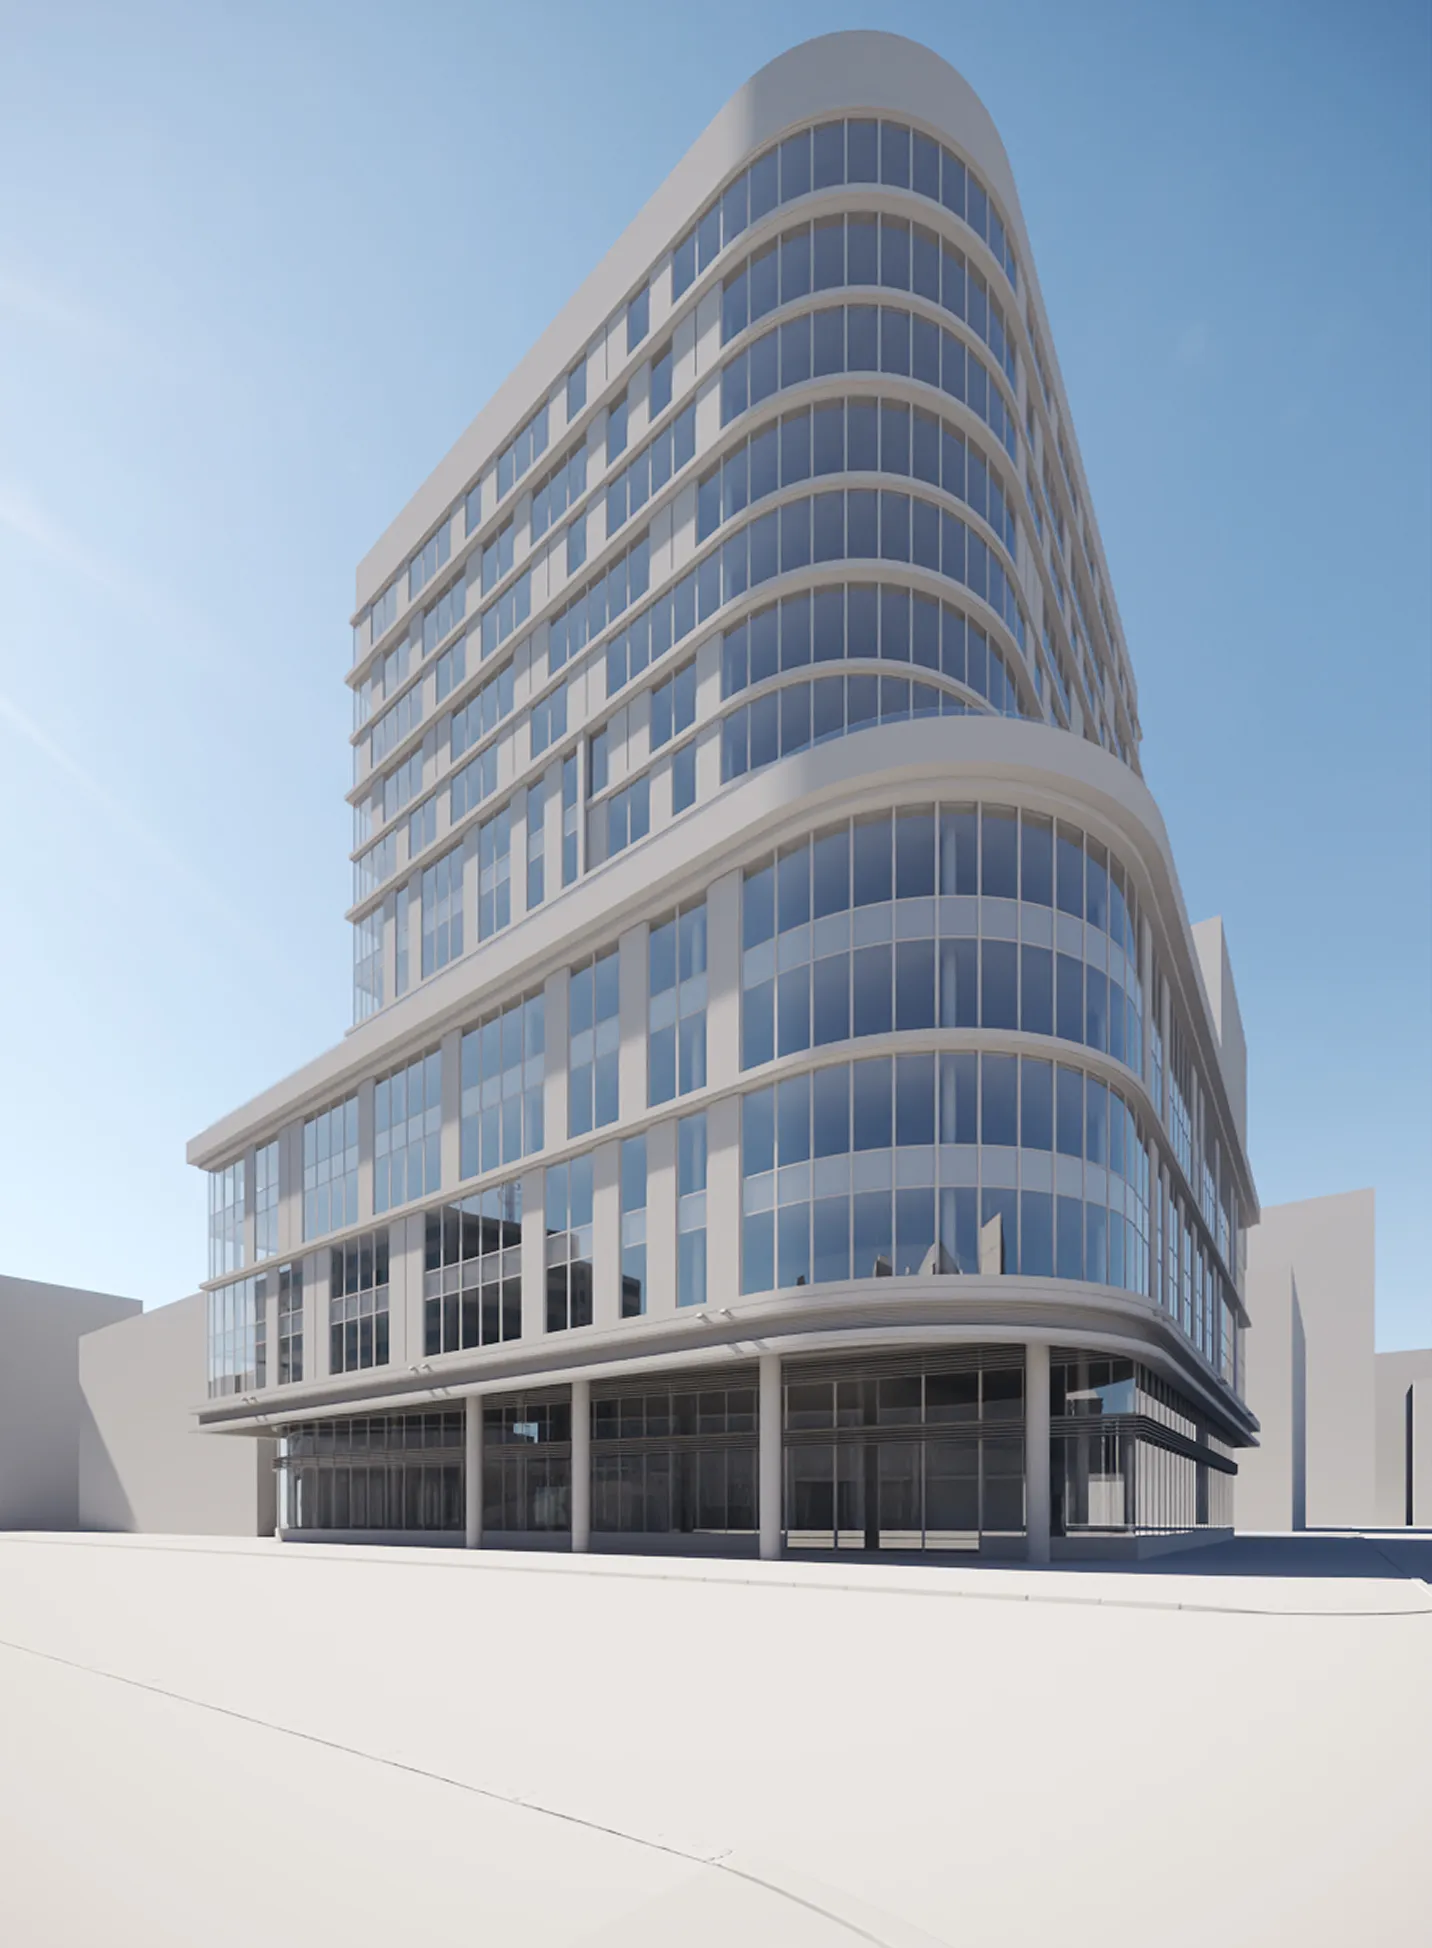
BASE MODELING
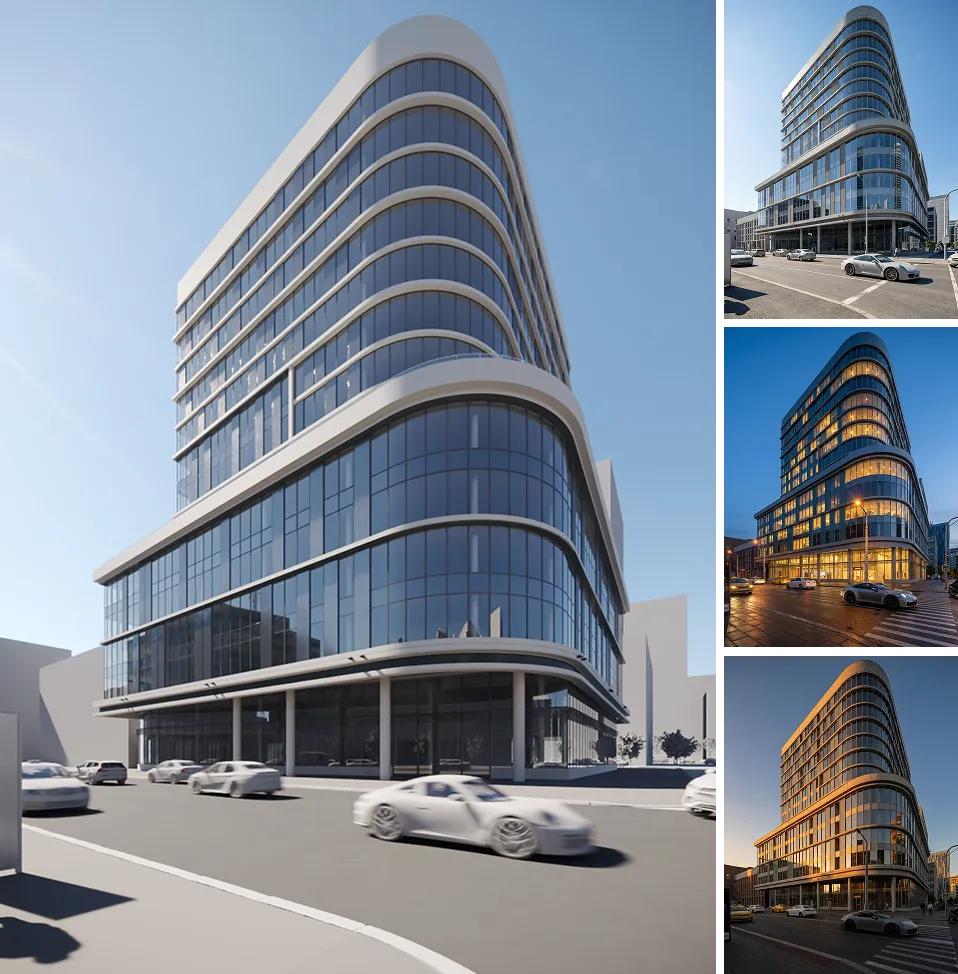
WE BUILD AN ACCURATE 3D MODEL OF THE SPACE OR BUILDING AND PLACE KEY FURNITURE (INTERIOR, LIFESTYLE PRODUCT)OR LANDSCAPING ELEMENTS (EXTERIOR) ACCORDING TO YOUR BRIEF.
BASIC SHADERS ARE APPLIED TO DEFINE COLORS AND VOLUMES, FOCUSING PURELY ON GEOMETRY WITHOUT DETAILS OR DECOR. THIS IS SHOWN IN THE NEXT STEP.
Client focus
No client involvement at this stage. The team adapts and refines the model internally, preparing a structurally accurate scene.
Approval milestone
First client review happens later, when base colors are applied and the initial visual draft is ready.
STEP 3
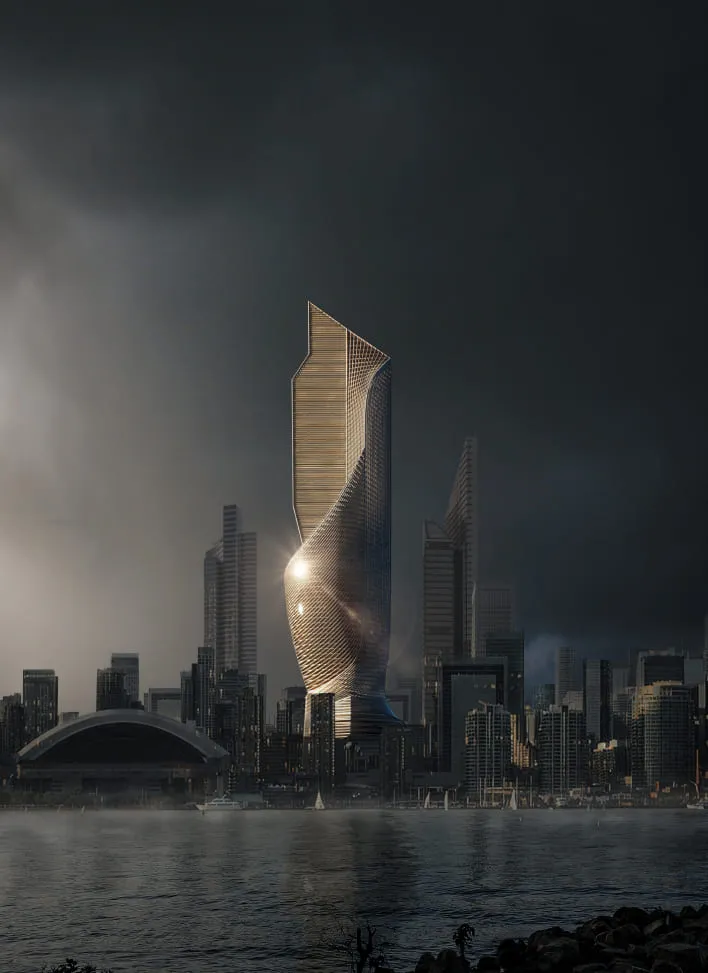
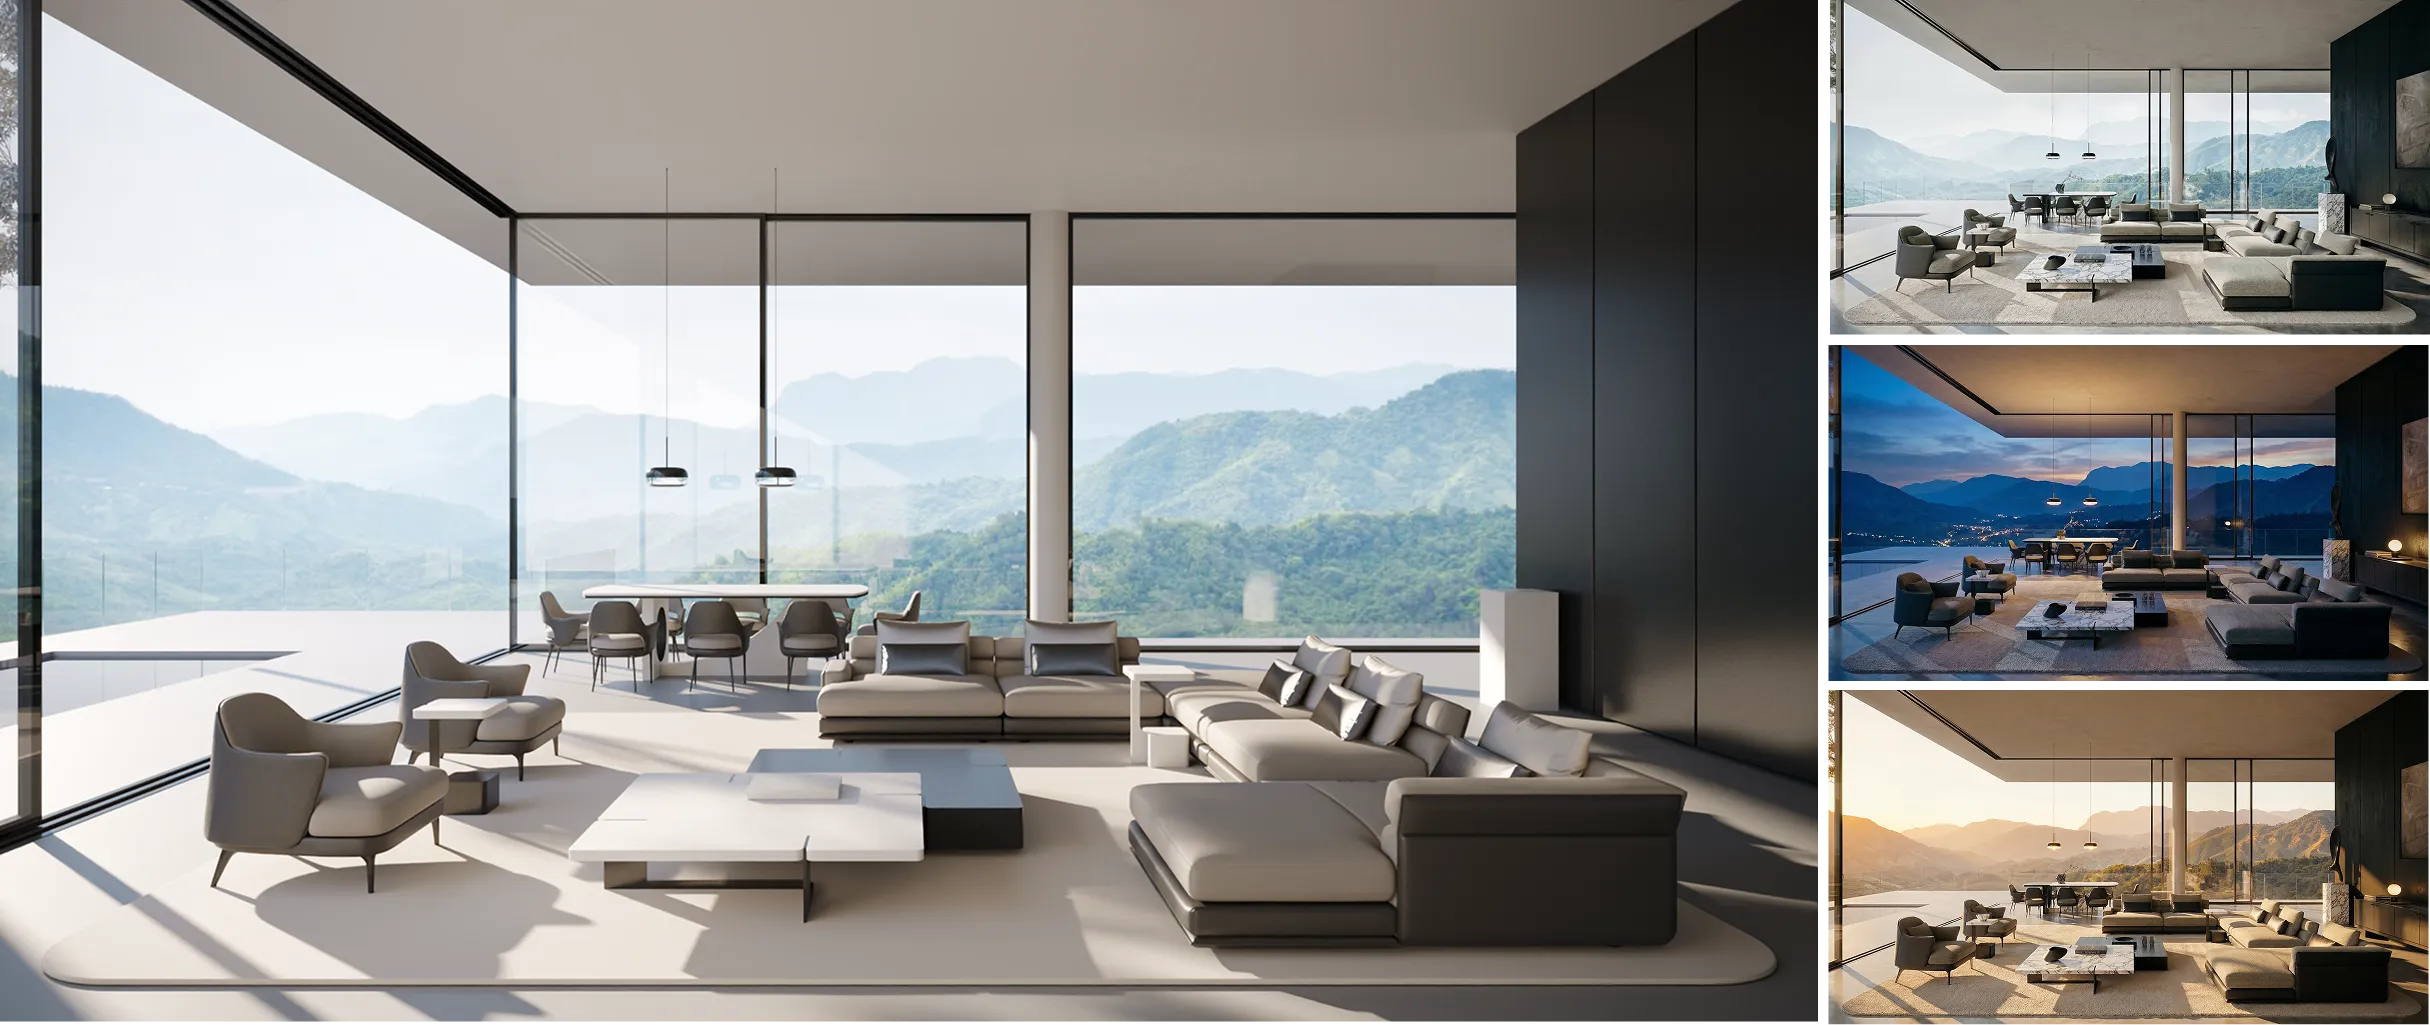
COMPOSITION + ATMOSPHERE
Together, we define camera angles and create atmosphere references tailored just for your project. You’ll have a chance to explore the composition and choose the mood and lighting that best fits your vision — day, sunset, or evening. At this stage, you can review the overall color balance and design direction without any distraction from materials or textures. This is your final opportunity to suggest any conceptual changes before we move into detailed production, ensuring everything feels just right for you.
Client focus
Project vision, references, timeline, and budget details.
Approval milestone
Approved brief and aligned scope.
STEP 4
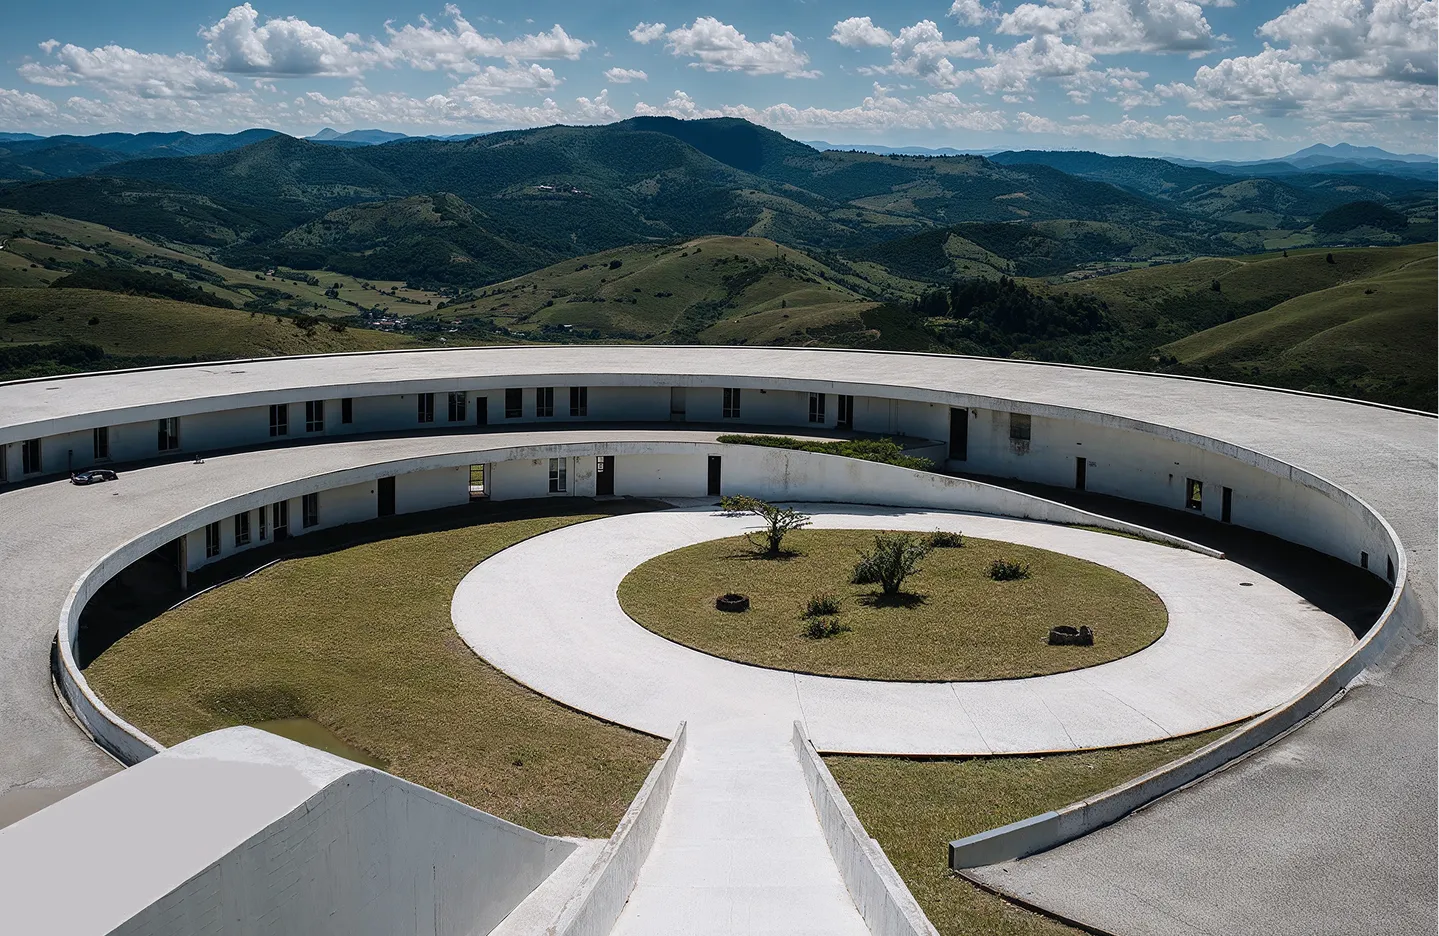
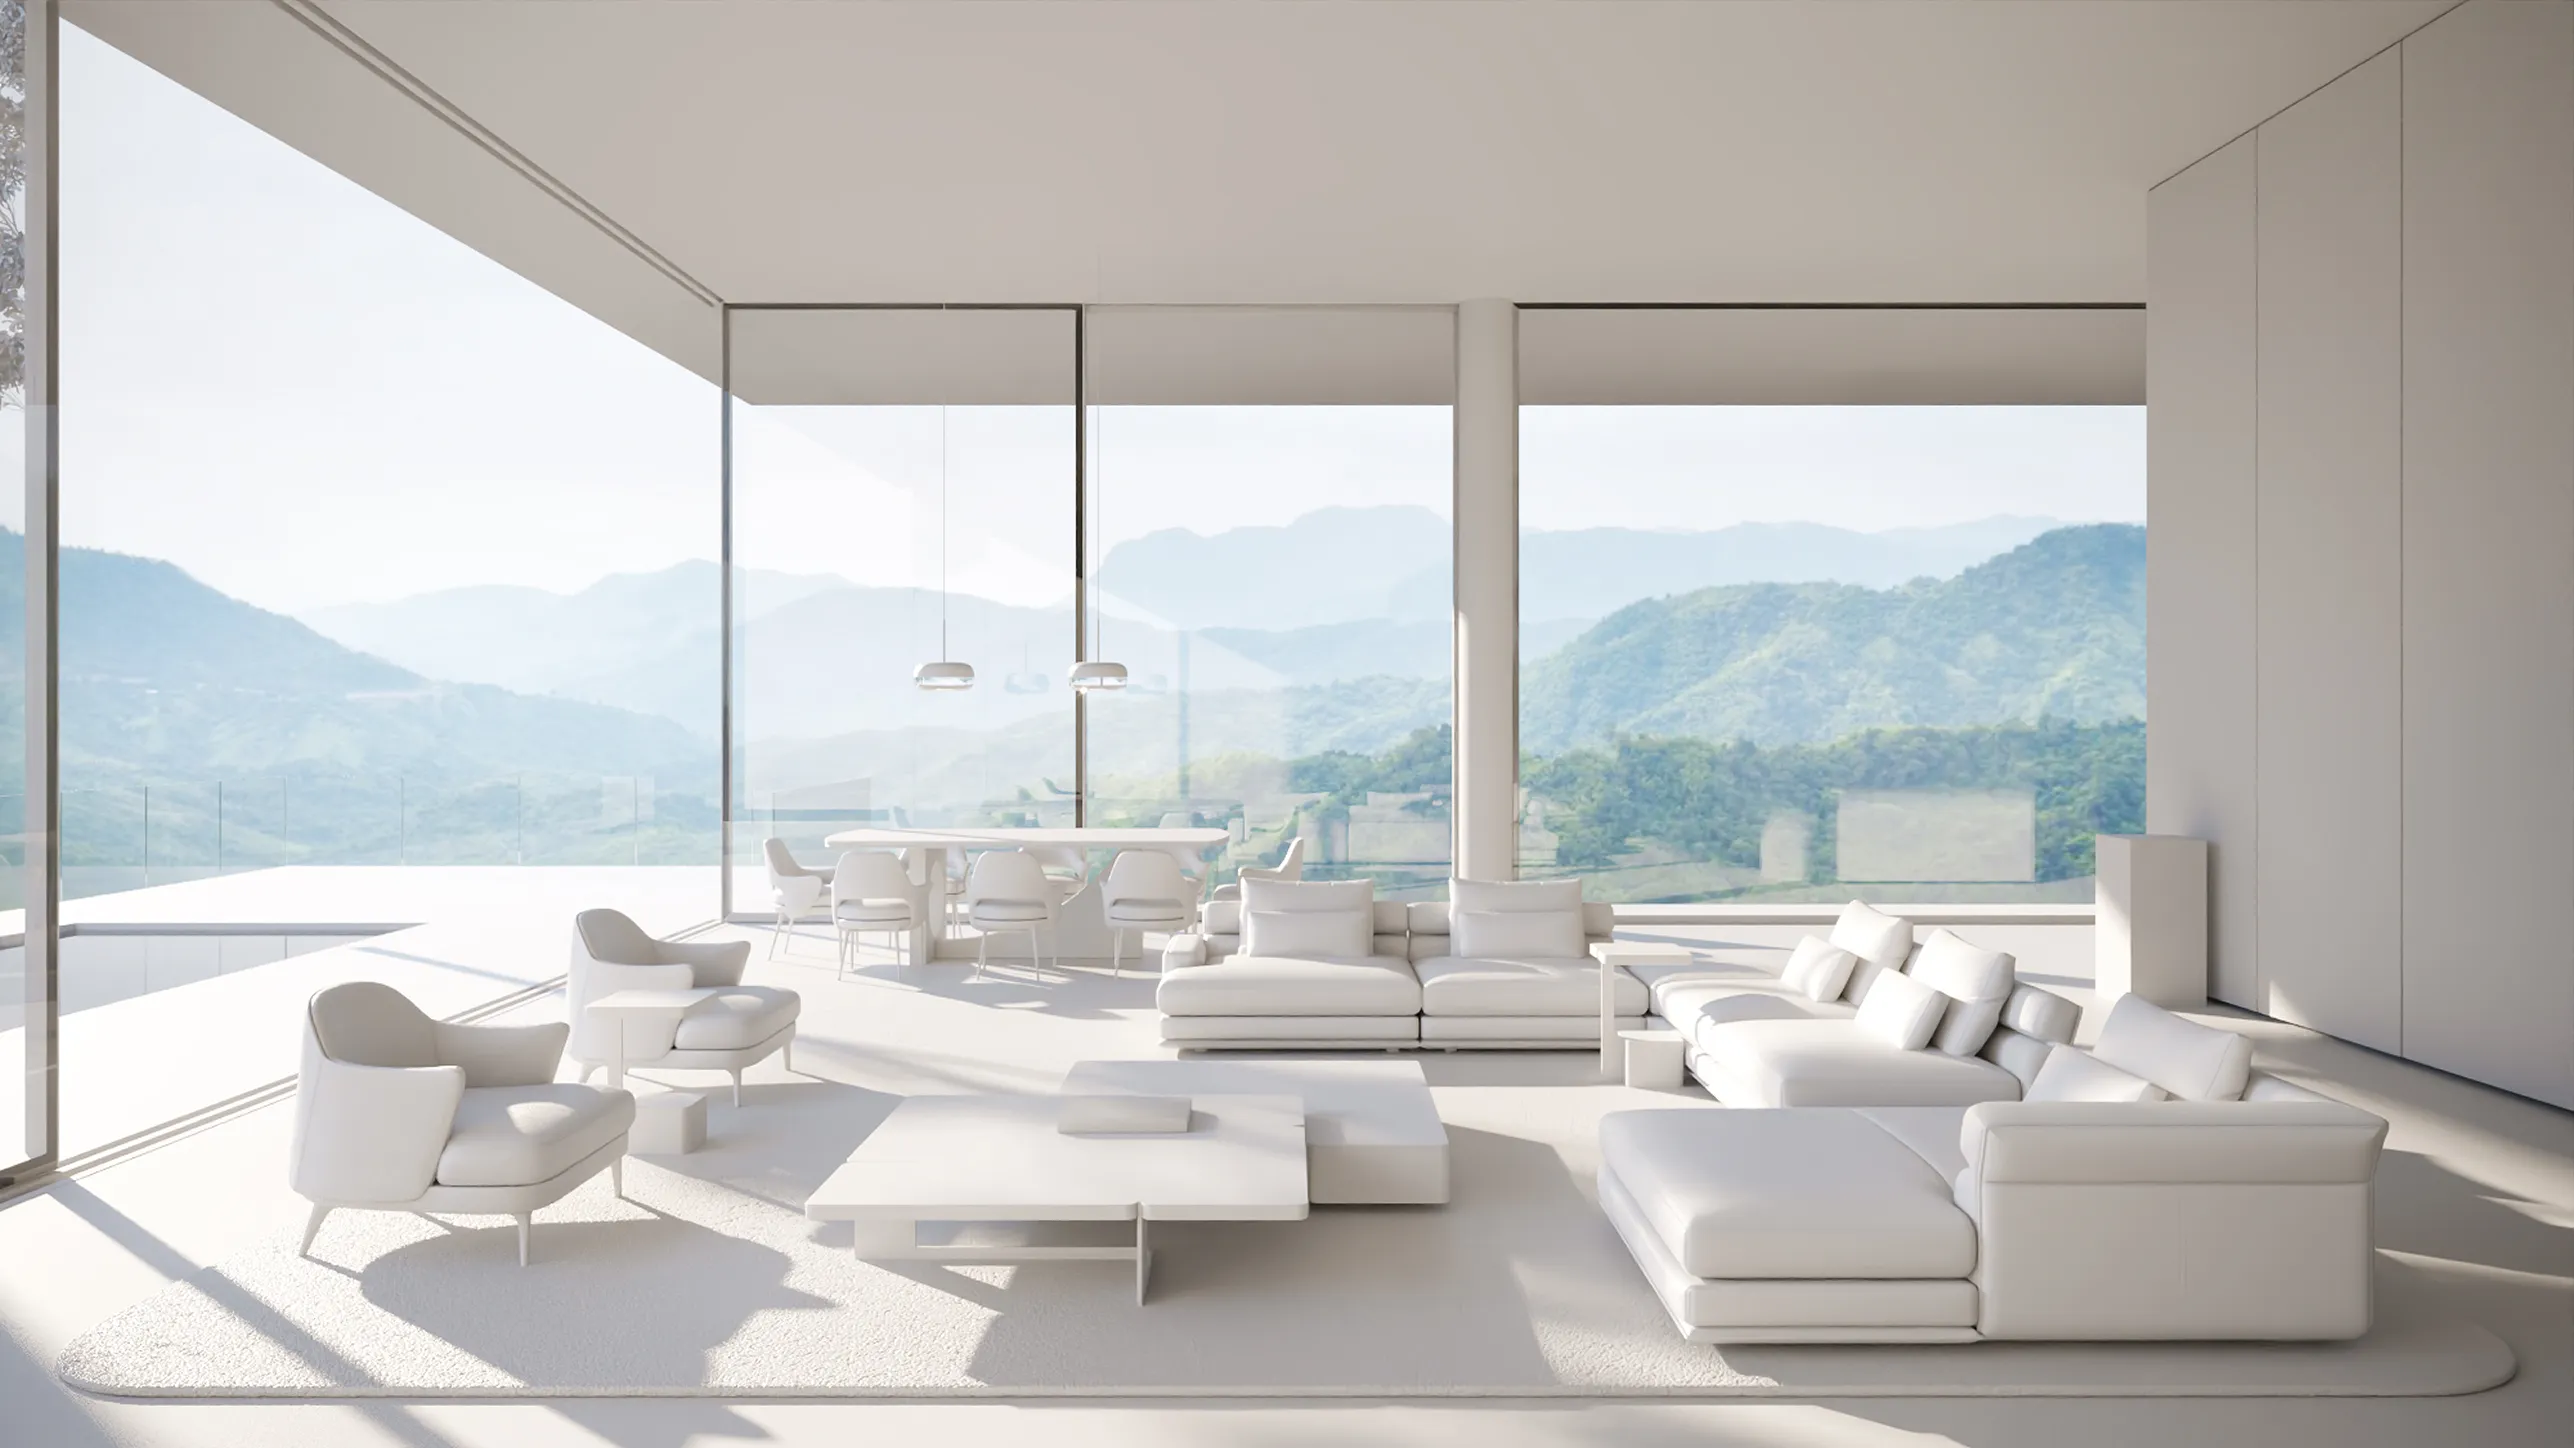
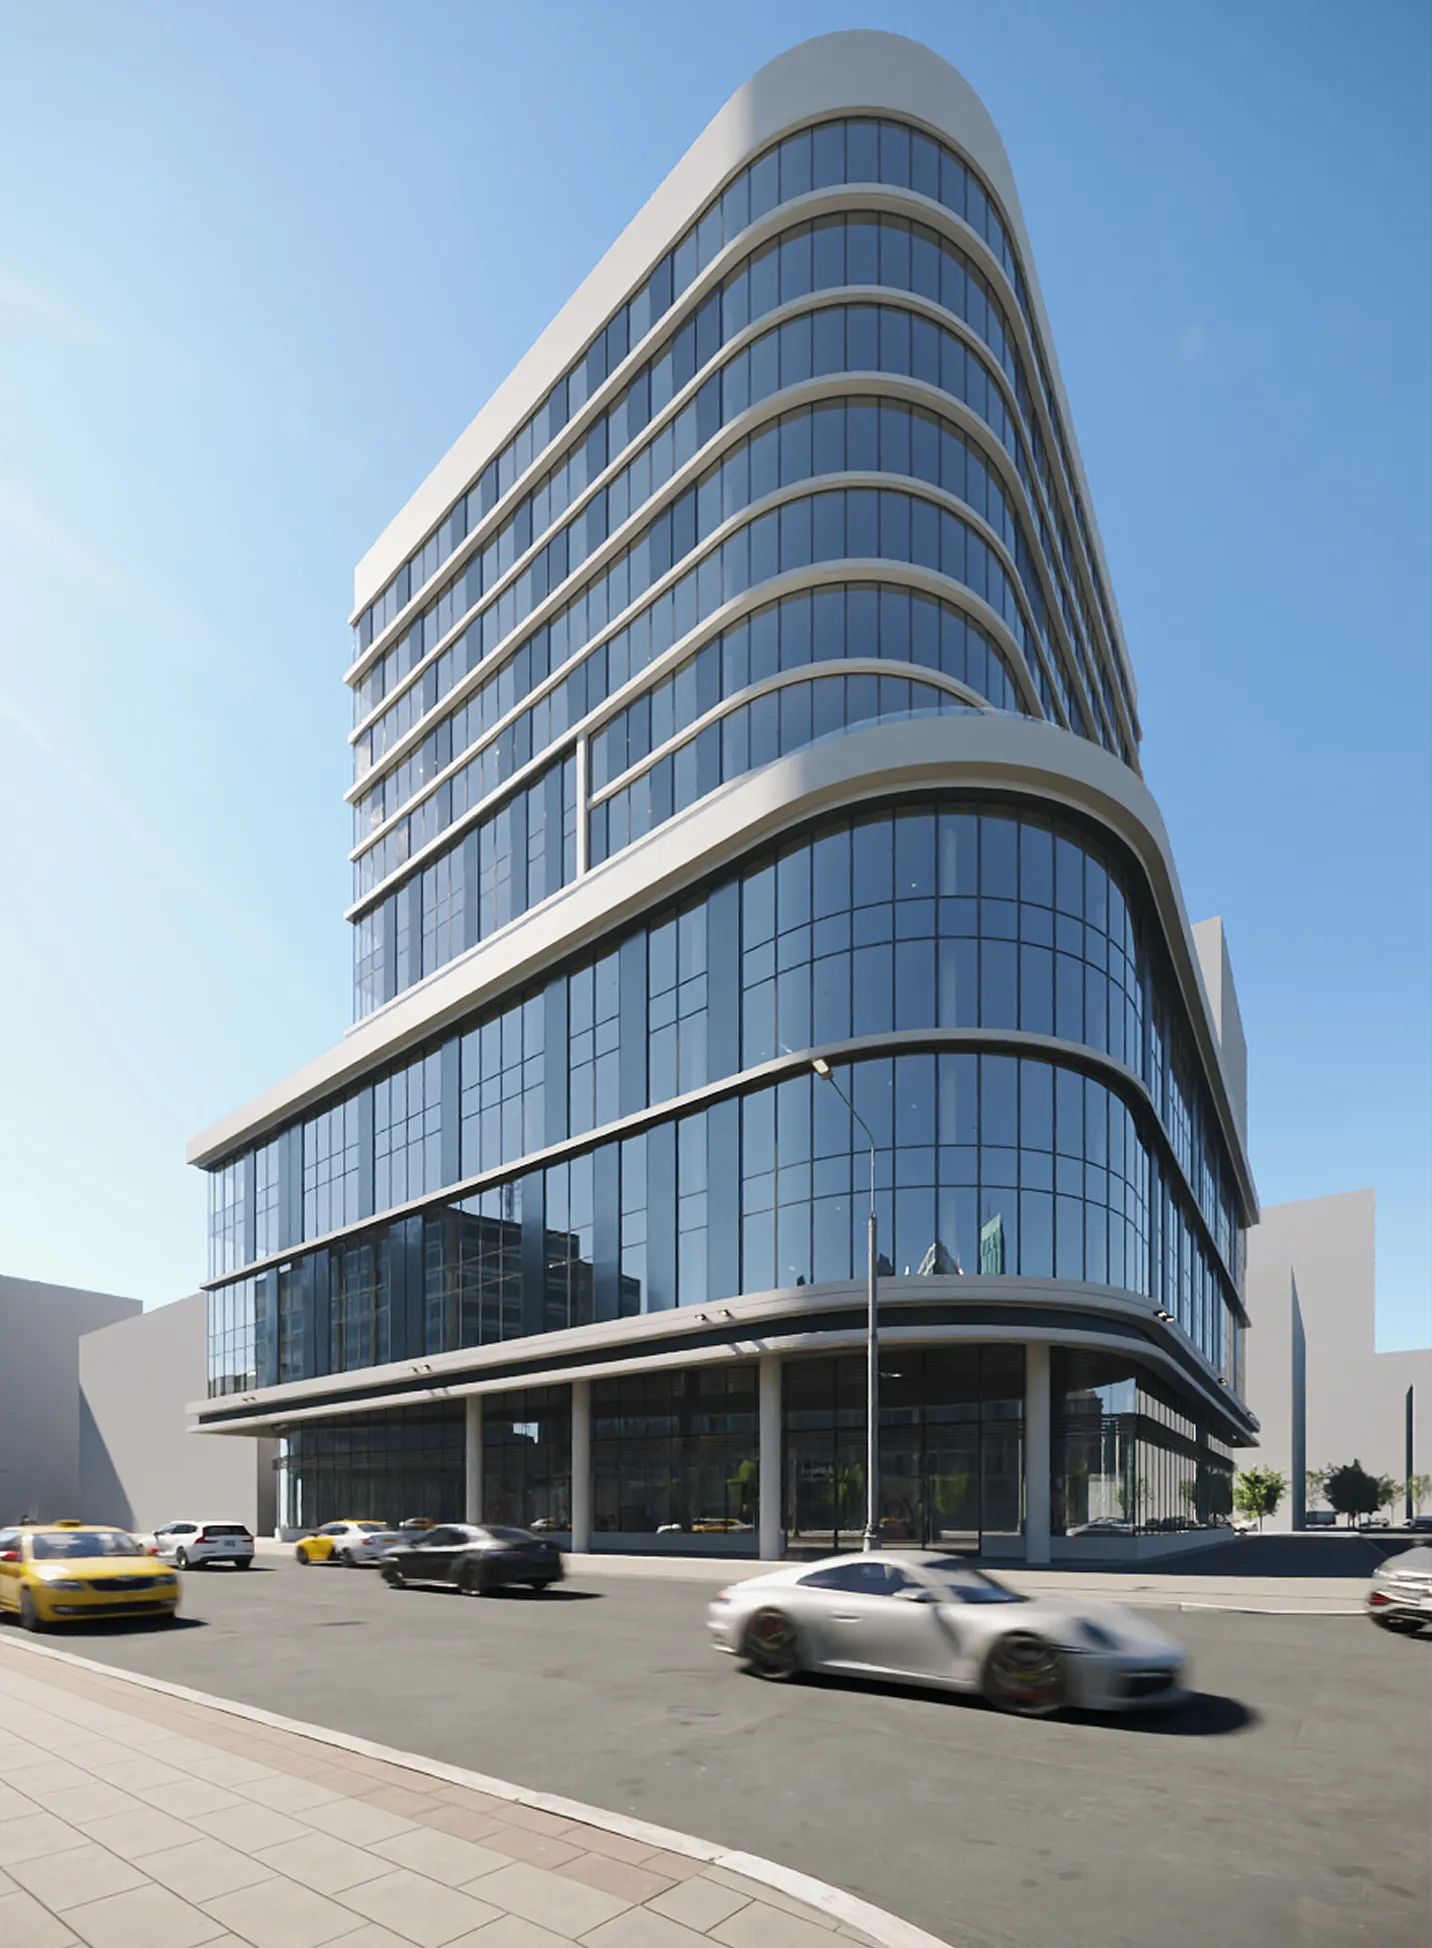
MATERIALIZATION
We apply final materials, textures, and refined lighting in line with the approved mood and direction. At this stage, the scene achieves realism in materials and lighting, and the core design elements are in place.
Pending tasks include adding decorative details such as artwork, plants, and accessories. Exterior scenes also require further development, as detailed background environments are not yet in place.
Client focus
No client involvement at this stage. The team adapts and refines the model internally, preparing a structurally accurate scene.
Approval milestone
First client review happens later, when base colors are applied and the initial visual draft is ready.

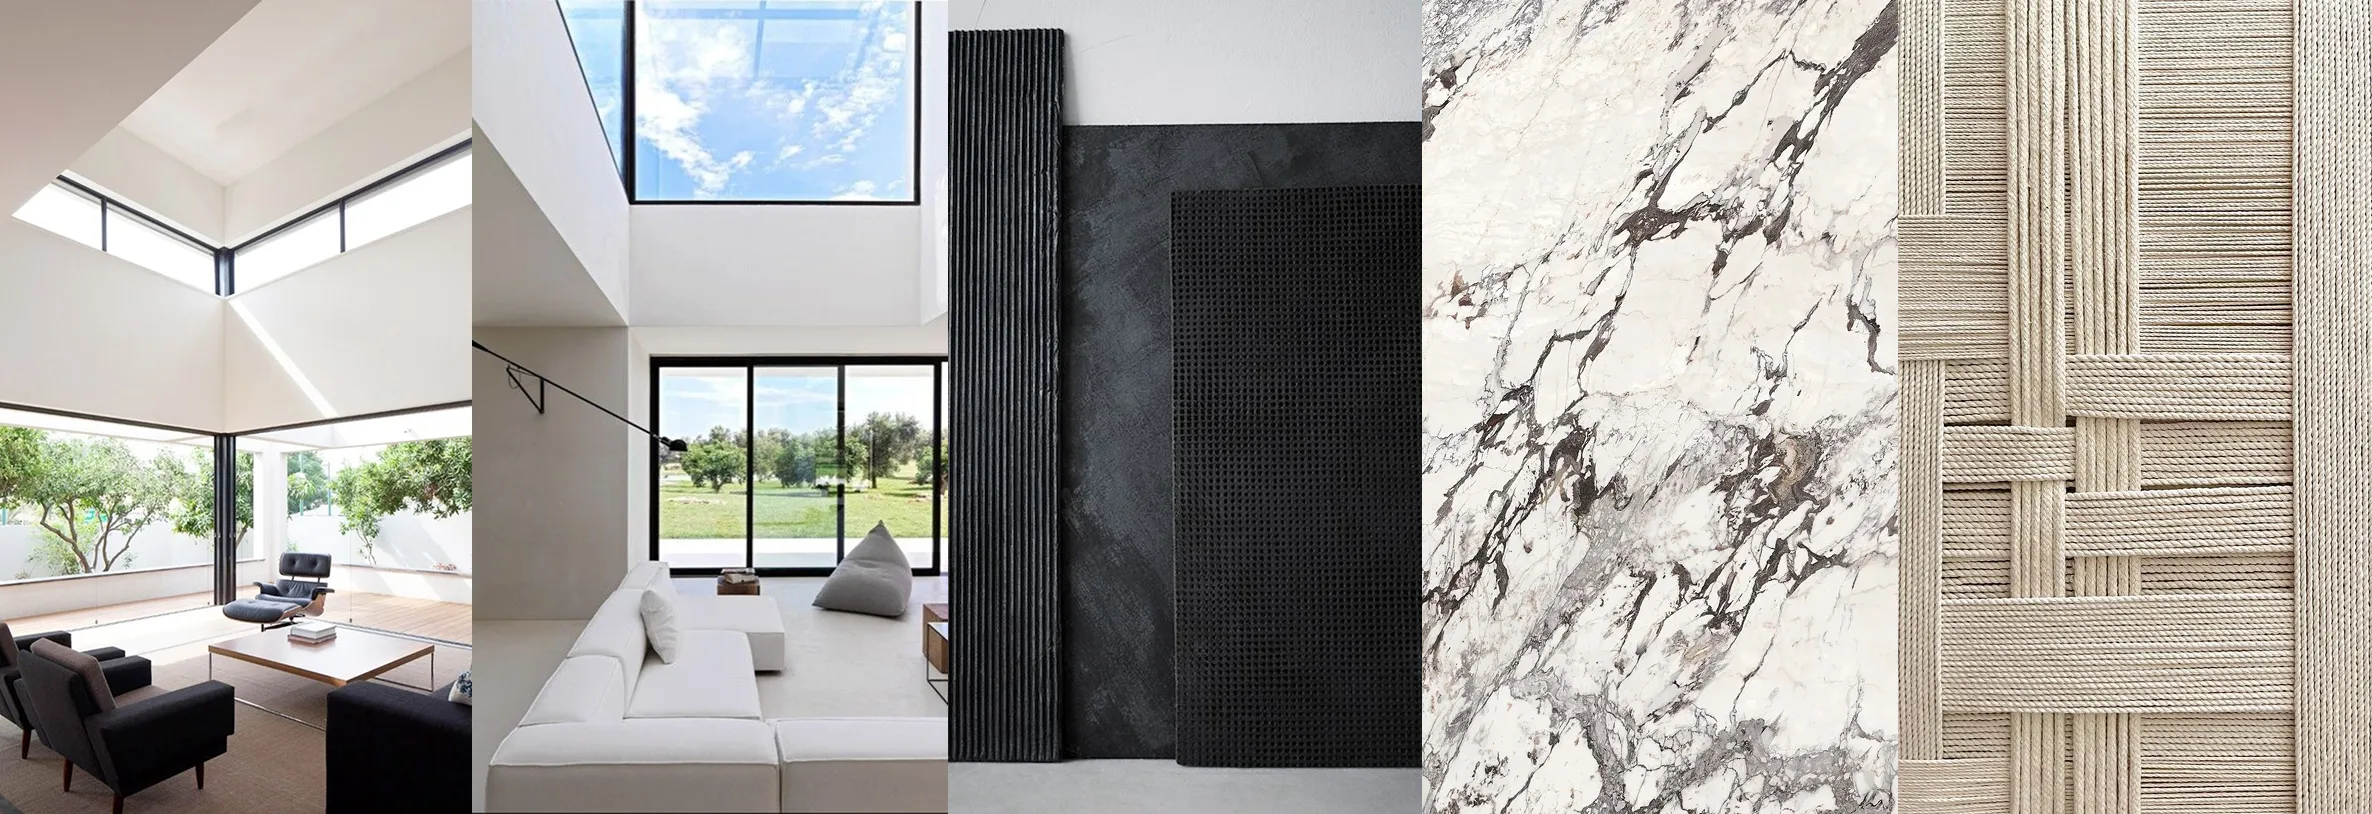
STEP 5
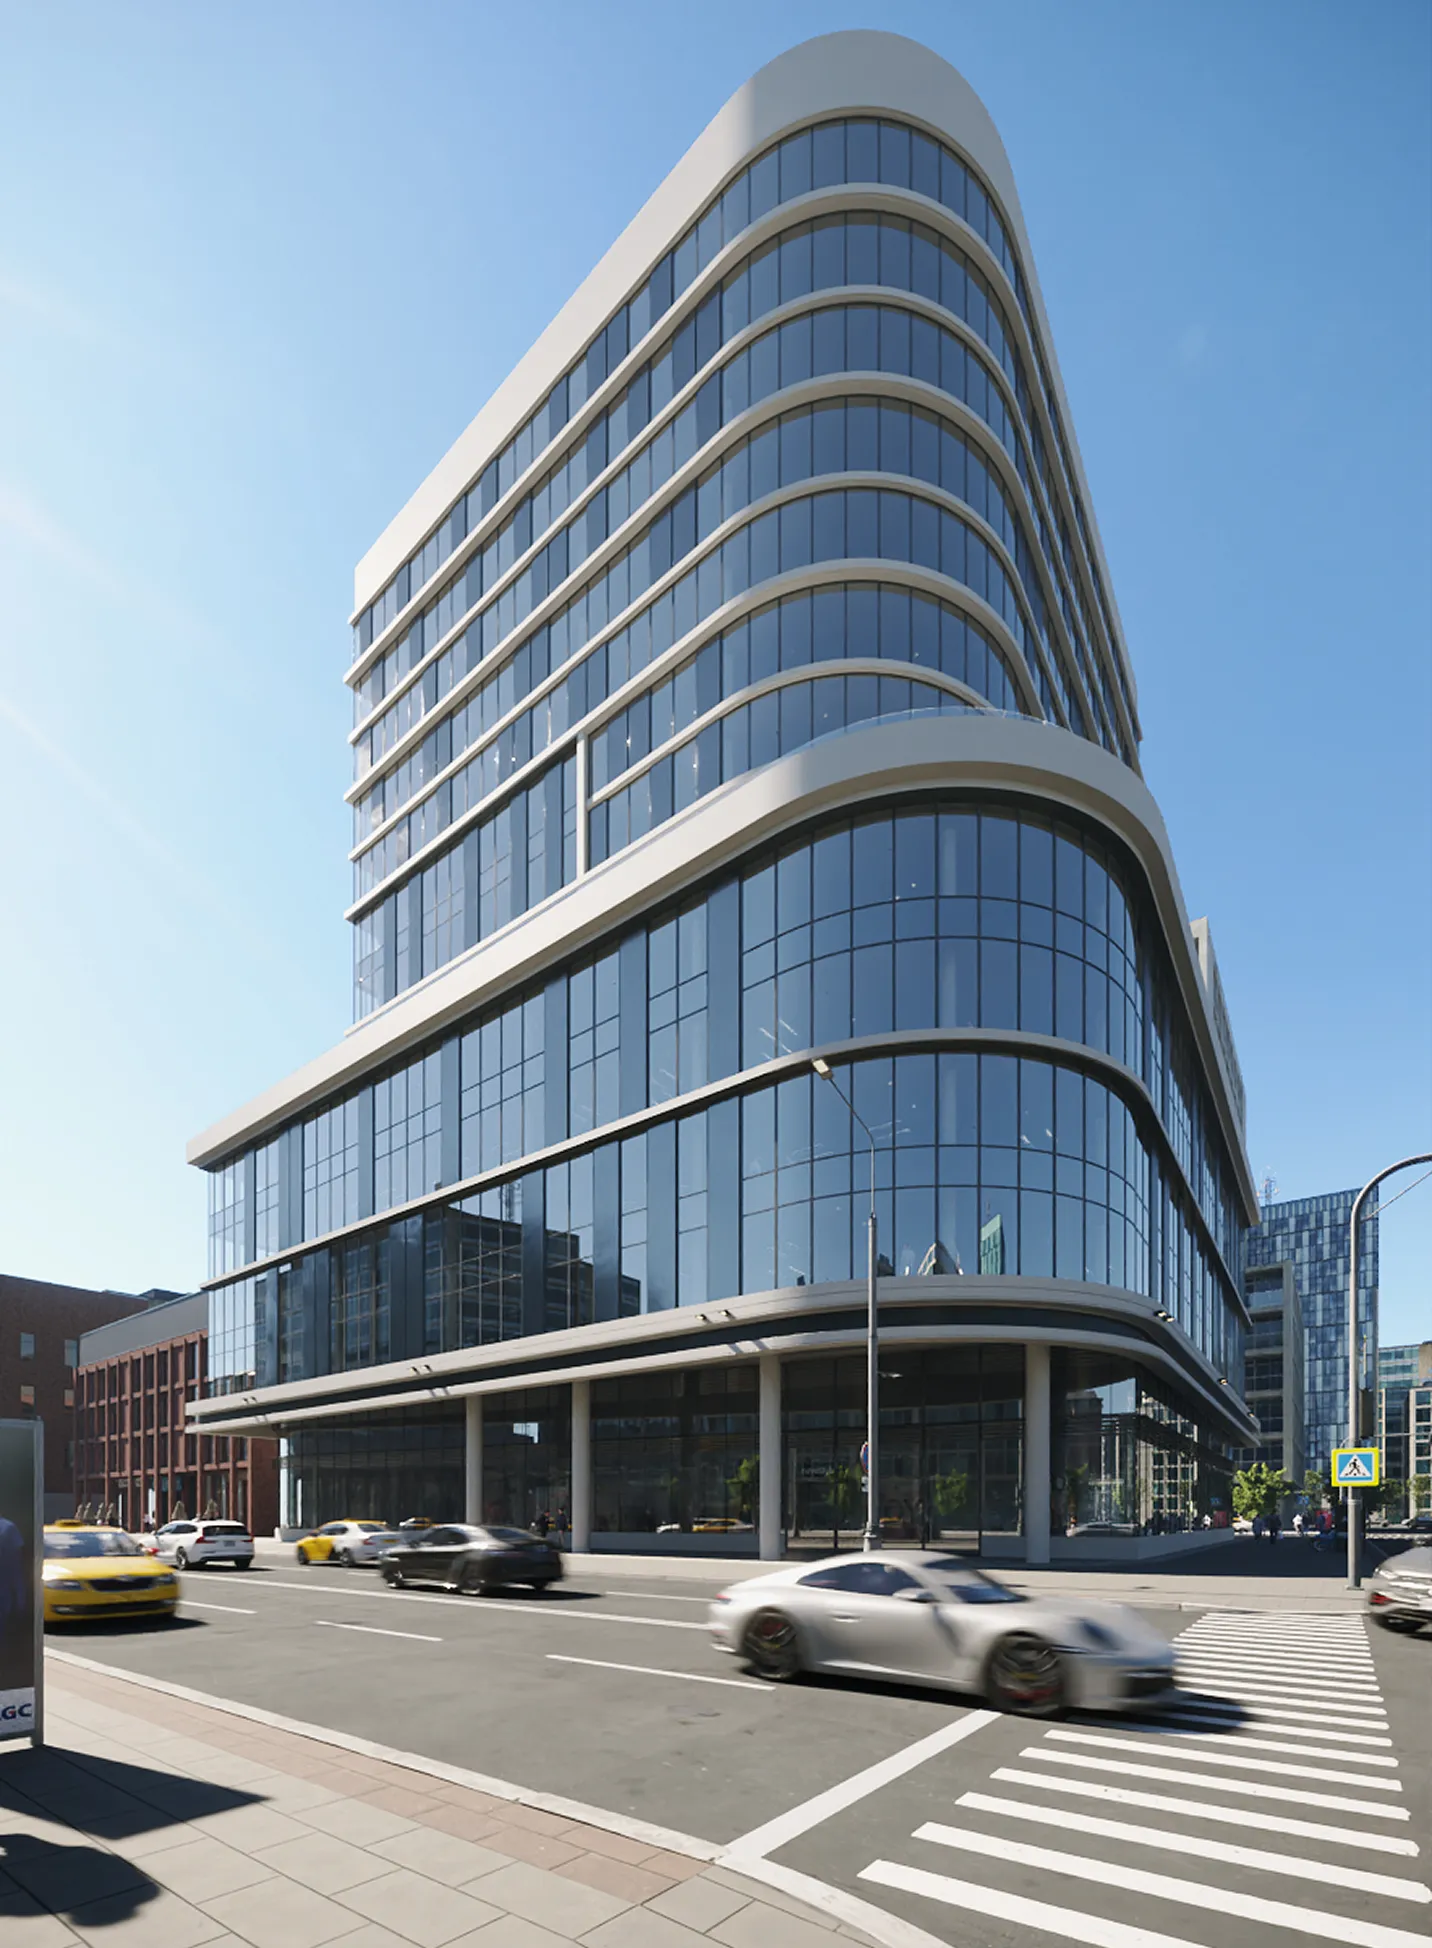
ADJUSTMENTS
We refine details step by step, adjusting minor elements and gradually enriching the scene with people, props, and atmosphere. This stage is focused on polishing rather than making structural changes, with the option to include additional feedback sessions as needed.
Client focus
Prioritize final detail tweaks and polish requests.
Approval milestone
Polished scene approved for final post-production.
STEP 6
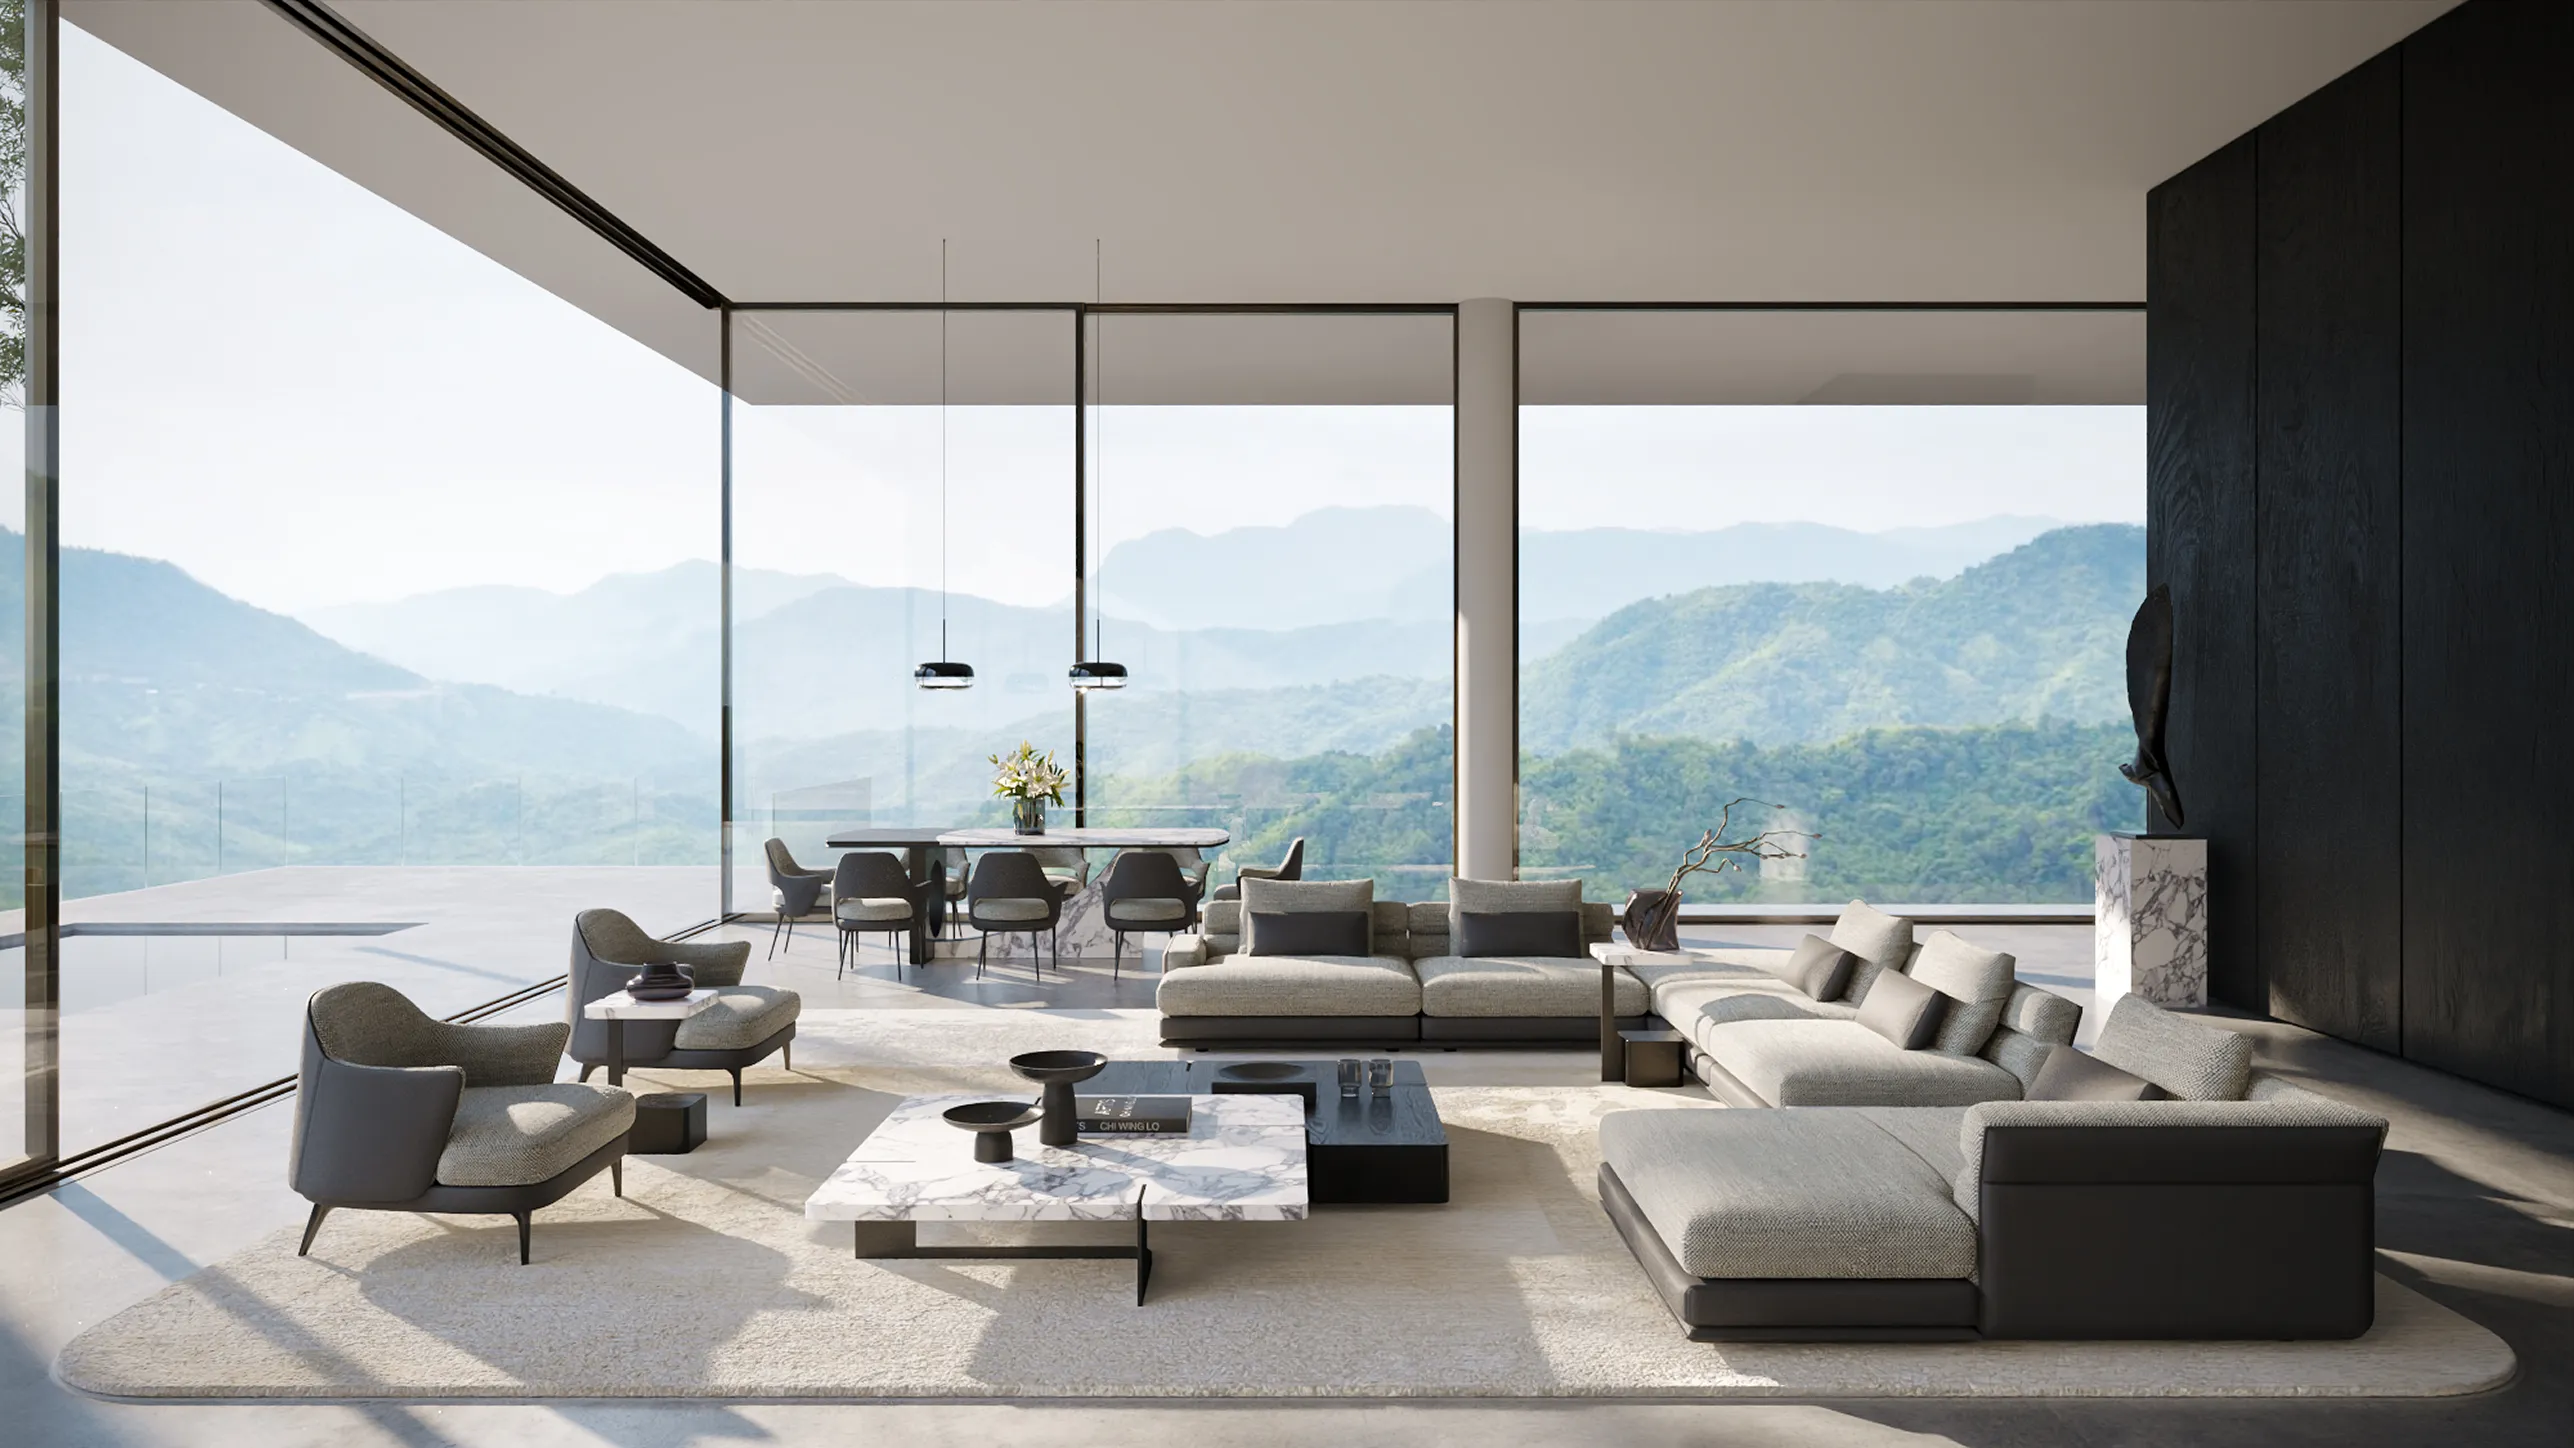
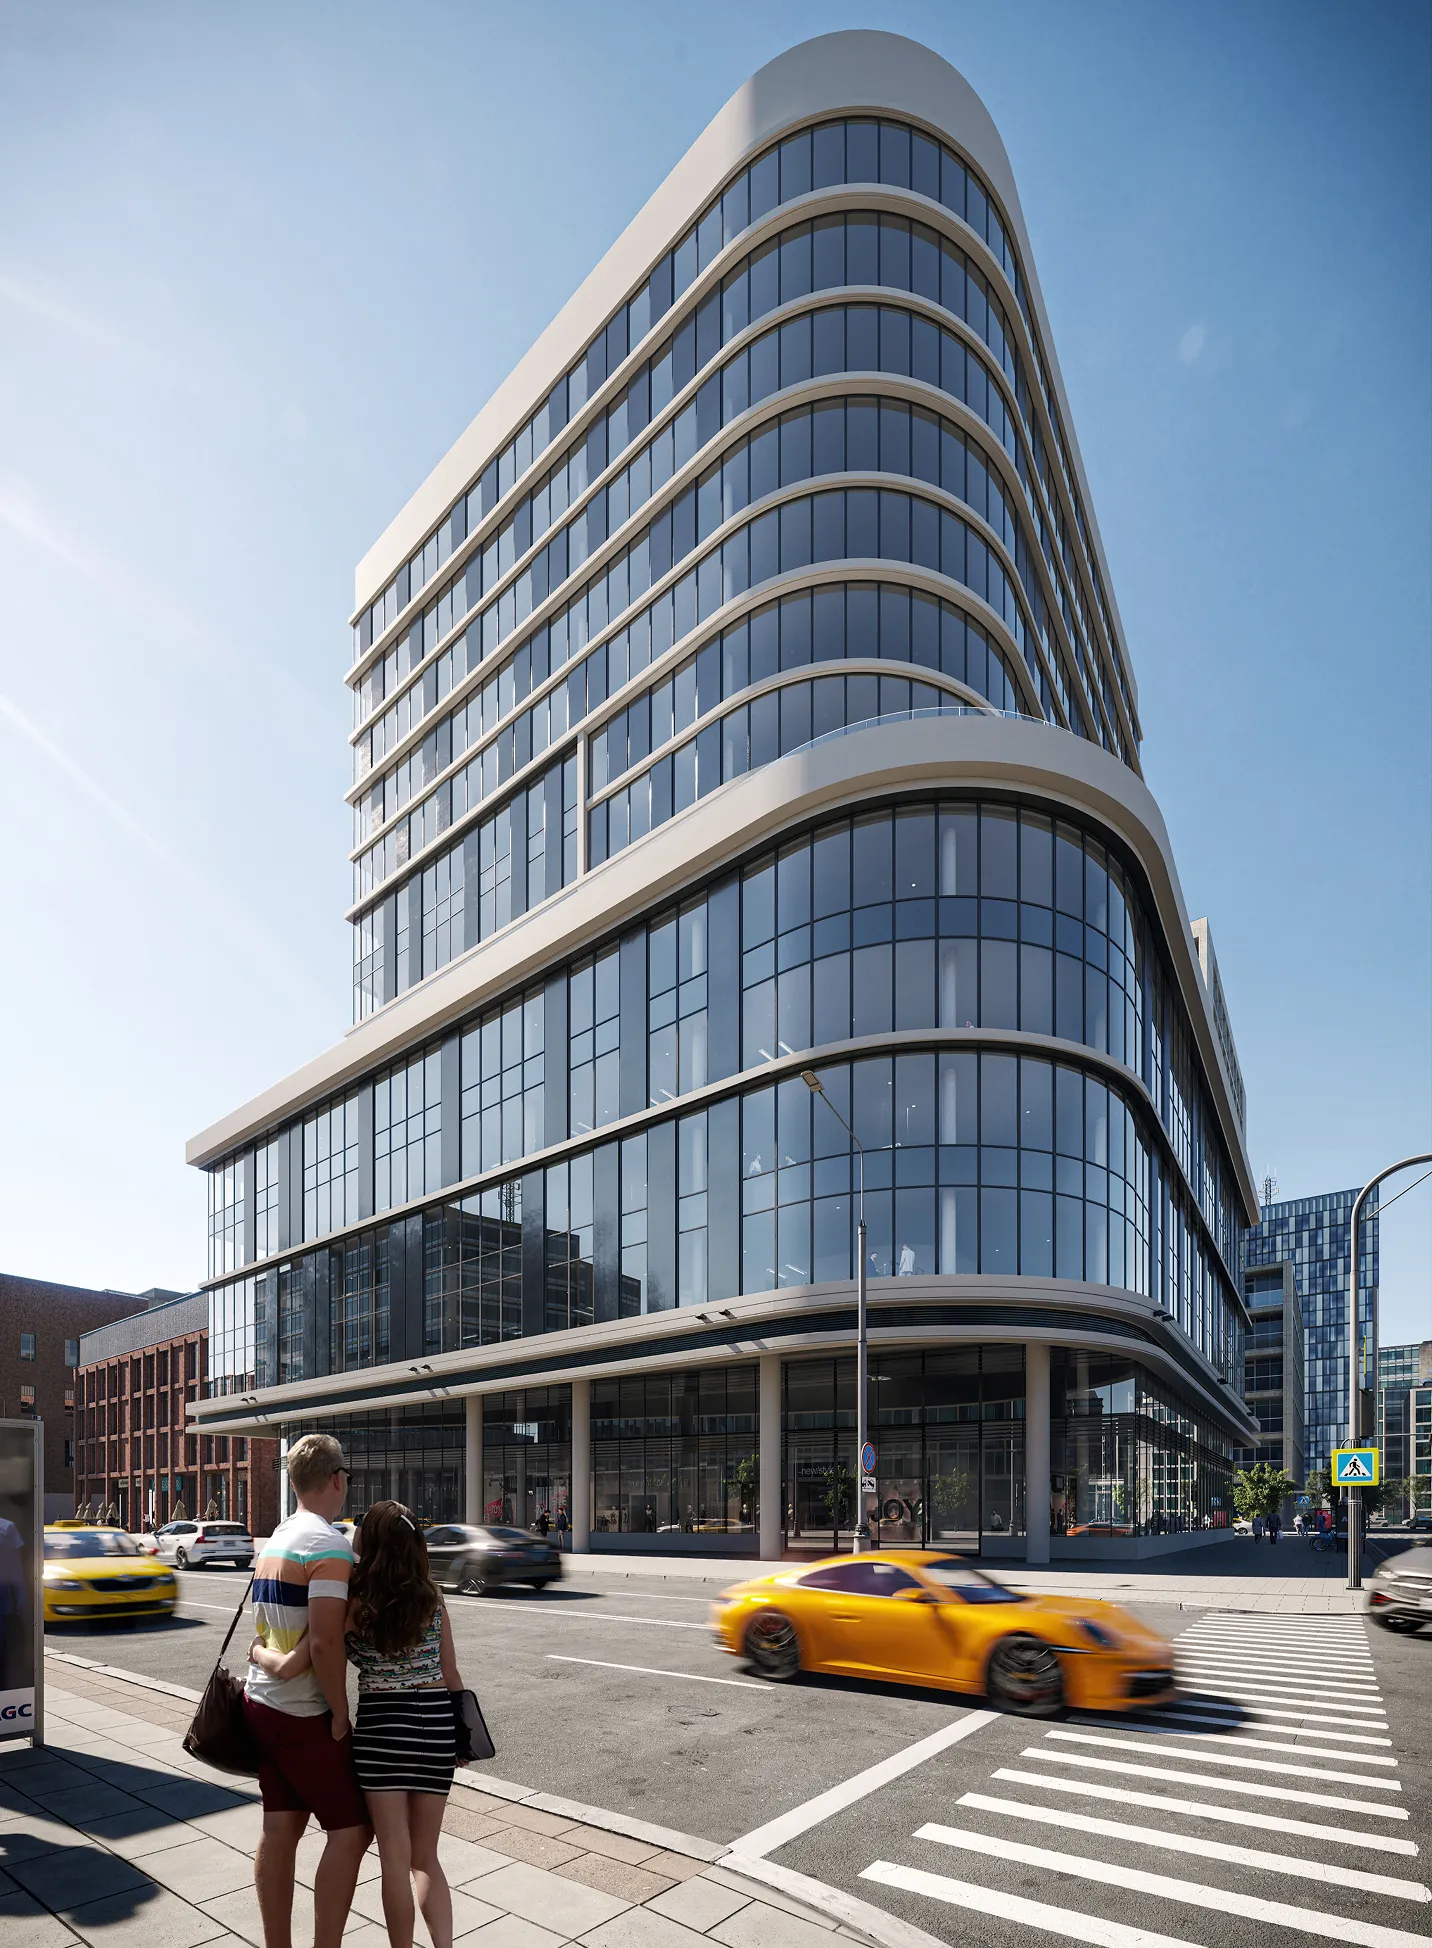
FINAL DELIVERY
We complete post-production and deliver high-quality final renders ready for presentation or marketing use. The scene is also prepared as a solid base for potential animation if required.
Client focus
Confirm output formats and usage requirements.
Approval milestone
Final renders delivered.
STEP 1
Discovery
Tell us about your project, including your vision, references, timeline, and budget. This stage allows us to define the scope and align expectations before production begins clearly.
Client focus
Project vision, references, timeline, and budget details.
Approval milestone
Approved brief and aligned scope.
STEP 3
COMPOSITION + ATMOSPHERE
Together, we define camera angles and create atmosphere references tailored just for your project. You’ll have a chance to explore the composition and choose the mood and lighting that best fits your vision — day, sunset, or evening. At this stage, you can review the overall color balance and design direction without any distraction from materials or textures. This is your final opportunity to suggest any conceptual changes before we move into detailed production, ensuring everything feels just right for you.
Client focus
Project vision, references, timeline, and budget details.
Approval milestone
Approved brief and aligned scope.
STEP 2
BASE MODELING
WE BUILD AN ACCURATE 3D MODEL OF THE SPACE OR BUILDING AND PLACE KEY FURNITURE (INTERIOR, LIFESTYLE PRODUCT)OR LANDSCAPING ELEMENTS (EXTERIOR) ACCORDING TO YOUR BRIEF.
BASIC SHADERS ARE APPLIED TO DEFINE COLORS AND VOLUMES, FOCUSING PURELY ON GEOMETRY WITHOUT DETAILS OR DECOR. THIS IS SHOWN IN THE NEXT STEP.
Client focus
No client involvement at this stage. The team adapts and refines the model internally, preparing a structurally accurate scene.
Approval milestone
First client review happens later, when base colors are applied and the initial visual draft is ready.
STEP 3
COMPOSITION + ATMOSPHERE
Together, we define camera angles and create atmosphere references tailored just for your project. You’ll have a chance to explore the composition and choose the mood and lighting that best fits your vision — day, sunset, or evening. At this stage, you can review the overall color balance and design direction without any distraction from materials or textures. This is your final opportunity to suggest any conceptual changes before we move into detailed production, ensuring everything feels just right for you.
Client focus
Project vision, references, timeline, and budget details.
Approval milestone
Approved brief and aligned scope.
STEP 5
ADJUSTMENTS
We refine details step by step, adjusting minor elements and gradually enriching the scene with people, props, and atmosphere. This stage is focused on polishing rather than making structural changes, with the option to include additional feedback sessions as needed.
Client focus
Prioritize final detail tweaks and polish requests.
Approval milestone
Polished scene approved for final post-production.
STEP 4
MATERIALIZATION
We apply final materials, textures, and refined lighting in line with the approved mood and direction. At this stage, the scene achieves realism in materials and lighting, and the core design elements are in place.
Pending tasks include adding decorative details such as artwork, plants, and accessories. Exterior scenes also require further development, as detailed background environments are not yet in place.
Client focus
No client involvement at this stage. The team adapts and refines the model internally, preparing a structurally accurate scene.
Approval milestone
First client review happens later, when base colors are applied and the initial visual draft is ready.
STEP 5
ADJUSTMENTS
We refine details step by step, adjusting minor elements and gradually enriching the scene with people, props, and atmosphere. This stage is focused on polishing rather than making structural changes, with the option to include additional feedback sessions as needed.
Client focus
Prioritize final detail tweaks and polish requests.
Approval milestone
Polished scene approved for final post-production.
STEP 6
FINAL DELIVERY
We complete post-production and deliver high-quality final renders ready for presentation or marketing use. The scene is also prepared as a solid base for potential animation if required.
Client focus
Confirm output formats and usage requirements.
Approval milestone
Final renders delivered.
REQUIREMENTS CHECKLIST
General
- Project brief (vision, references, mood)
- Timeline and budget
- Preferred camera angles (if any)
3D & Technical
- 3D Models (Revit, SketchUp, Rhino, etc.)
- CAD drawings (plans, elevations, sections)
- Site plan / layout
Additional
- Background images / context
- Preferred time of day
- Special requests (animation, extra stages, etc.)
Design
- Material & finish specifications
- Furniture references
- Color palette (if available)
- Lighting intent (if defined)
FAQS
WHY ARE CLAY RENDERINGS AND INITIAL PREVIEWS NECESSARY?
They allow you to evaluate composition, camera angles, and overall mood before details are added. This helps catch and adjust key decisions early, saving time and avoiding costly changes later.
CAN ANY OF THE PROJECT STAGES BE SKIPPED?
In some cases, yes. It depends on your timeline and project needs. However, each stage is designed to reduce risk and ensure quality, so skipping steps may limit flexibility and increase the chance of revisions later.
CONTACT US
TO GET PERSONAL OFFER
THANKS!
REQUEST HAS SENT
WE WILL CONTACT YOU SHORTLY
SERG TOMAKH
DEVELOPMENT MANAGER
REVA SYKE RD, BRADFORD, UK
D3, DUBAI DESIGN DISTRICT,
DUBAI, UNITED ARAB EMIRATES


