DO YOU HAVE ANY QUESTIONS?
THANKS!
REQUEST HAS SENT
WE WILL CONTACT YOU SHORTLY


SERG TOMAKH
DEVELOPMENT MANAGER
Or contact us via email hello@omegarender.com


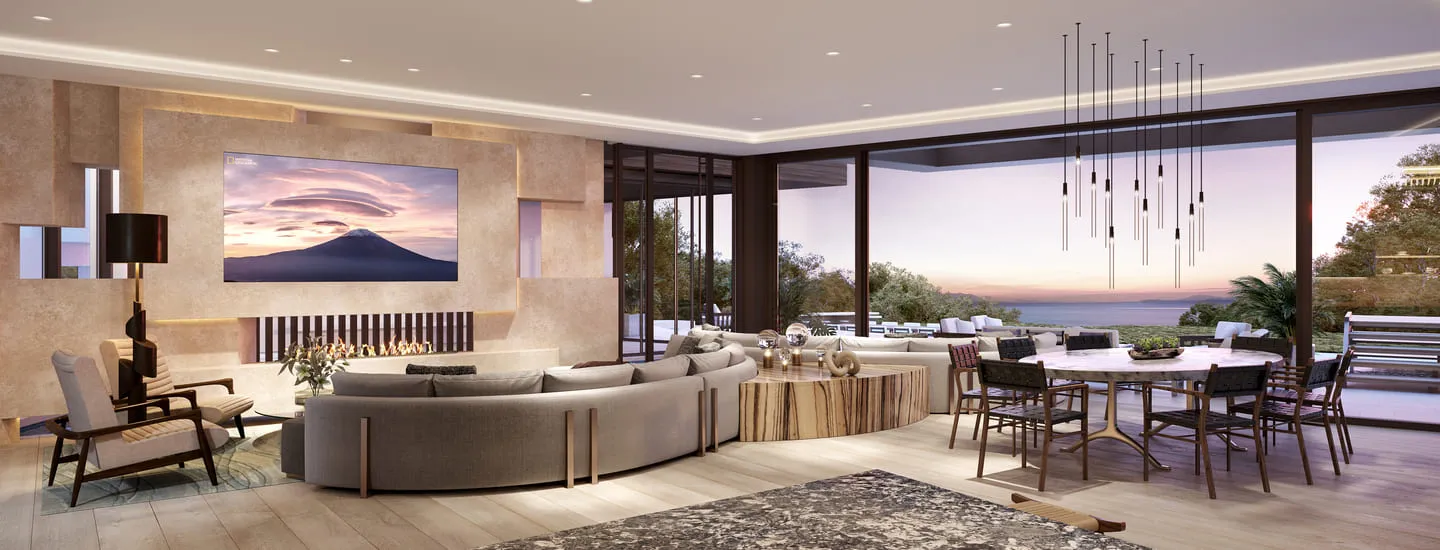
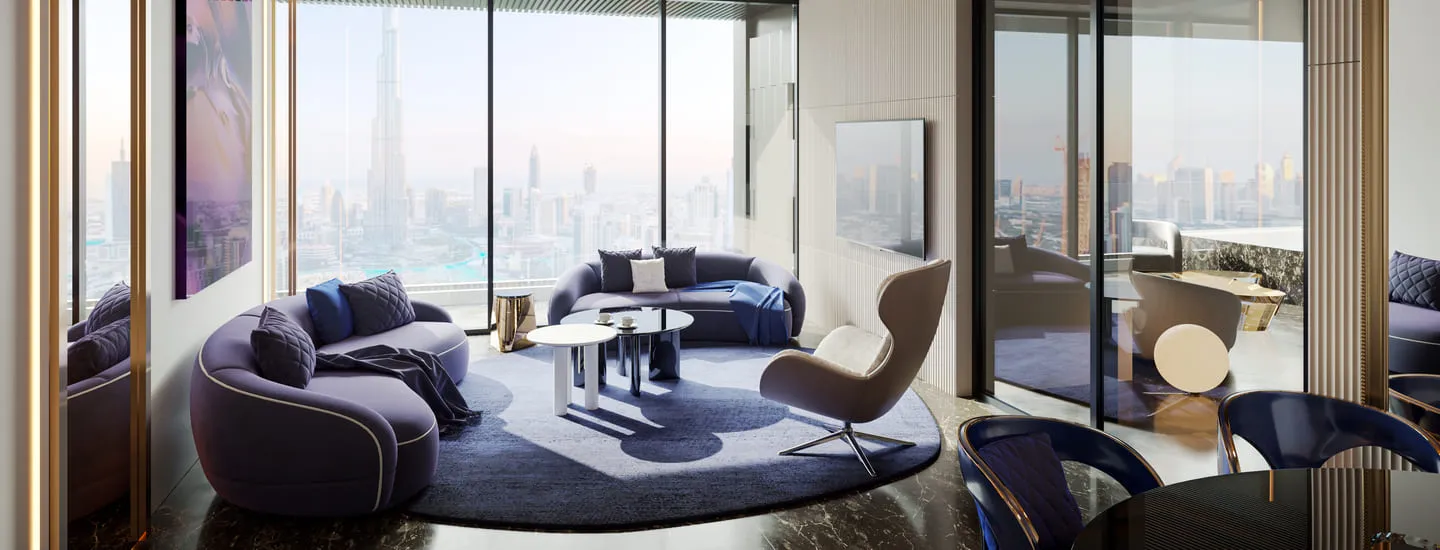
Bringing Spaces to Life: The Impact of 3D Rendering on Living Room Design
Why Is 3D Rendering of Living Rooms Important
Interior designers and real estate professionals often struggle to convey their vision to clients. Living room design, a central element of any home, requires precise communication of concepts and ideas. Traditional sketches and 2D plans often lack the necessary clarity and detail. 3D rendering revolutionizes how living room designs are presented and perceived. High-quality, photorealistic 3D renderings allow designers to showcase their concepts in vivid detail. Clients can see exactly how the final space will look, complete with textures, lighting, and furnishings. This enhances understanding and helps make informed decisions, reducing costly changes later. For real estate developers and agencies, 3D renderings are powerful marketing tools that attract buyers by providing a realistic property preview. To learn more about the benefits, visit the advantages of 3d visualization.
How to Render Your Living Room
Creating an effective 3D living room rendering involves detailed steps and design principles. Here’s a step-by-step guide:
1. Gather Accurate Measurements: Begin with precise measurements of the living room. This includes walls, windows, doors, and any architectural features.
2. Select Design Software: Use professional design software such as AutoCAD, SketchUp, or 3ds Max. These tools offer advanced features for creating detailed renderings.
3. Model the Room: Based on your measurements, create a 3D model of the living room. Ensure that all dimensions are accurate to scale.
4. Add Furniture and Decor: Populate the model with furniture, lighting, and decor. Choose items that match the intended design style and client preferences.
5. Apply Textures and Materials: Use realistic textures and materials to give the rendering a lifelike appearance. Pay attention to details like fabric patterns, wood grains, and metallic finishes.
6. Set Up Lighting: A photorealistic rendering requires proper lighting. Try varying natural and artificial light sources to create the desired ambiance.
7. Render the Image: Using rendering software to generate high-quality images once the model is complete. Adjust settings for resolution, lighting, and shadows to achieve the best results.
8. Post-Processing: Use picture editing software to enhance the final renderings. This may include adjusting colors, contrast, and adding effects.
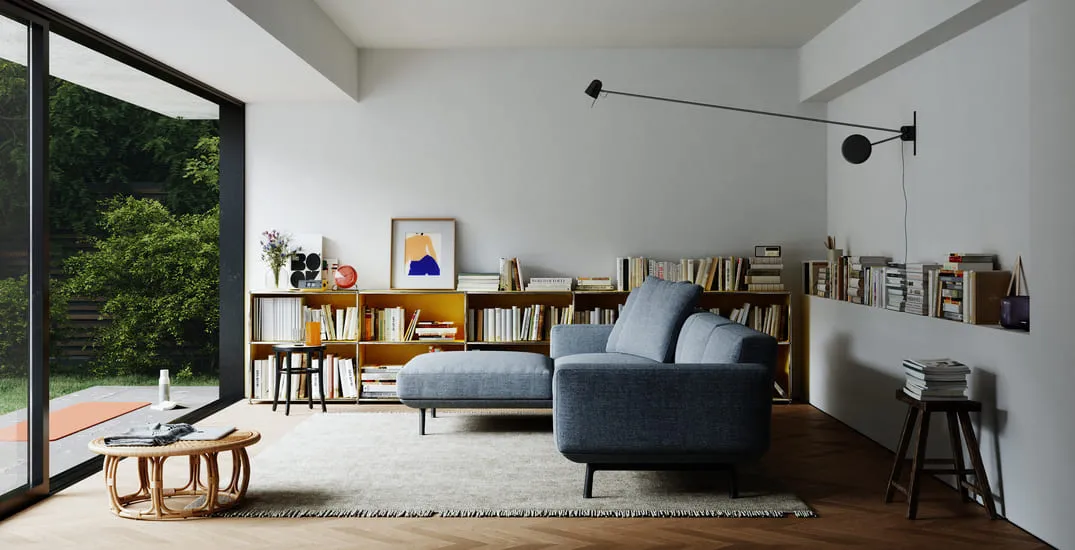
Benefits of Living Room 3D Renderings
Enhanced Visualization
3D renderings provide a clear, detailed view of the living room design, allowing clients to fully grasp the designer’s vision. This is especially beneficial for complex designs where 2D plans may not suffice. With photorealistic images, clients can make informed decisions about furniture placement, color schemes, and overall aesthetics, reducing misunderstandings and ensuring satisfaction with the final outcome. For more on the costs involved, check out 3d rendering cost. For full-home presentations, single-family home rendering can also help clients understand how the living room fits into the overall exterior and layout.
Decision-Making
With photorealistic images, clients can make informed decisions about furniture placement, color schemes, and overall aesthetics. This reduces misunderstandings and ensures satisfaction with the final outcome.
Flexibility and Options
Designers can showcase multiple design options to clients, allowing them to choose their preferred style. This flexibility helps in catering to diverse tastes and preferences.
Marketing Advantage
For real estate developers and agencies, 3D renderings are invaluable marketing tools. They attract potential buyers by offering a realistic property preview, enhancing interest and engagement.
Cost and Time Efficiency
By visualizing the final design beforehand, any necessary changes can be made during the planning stage. This prevents costly alterations during construction or furnishing, saving both time and money.
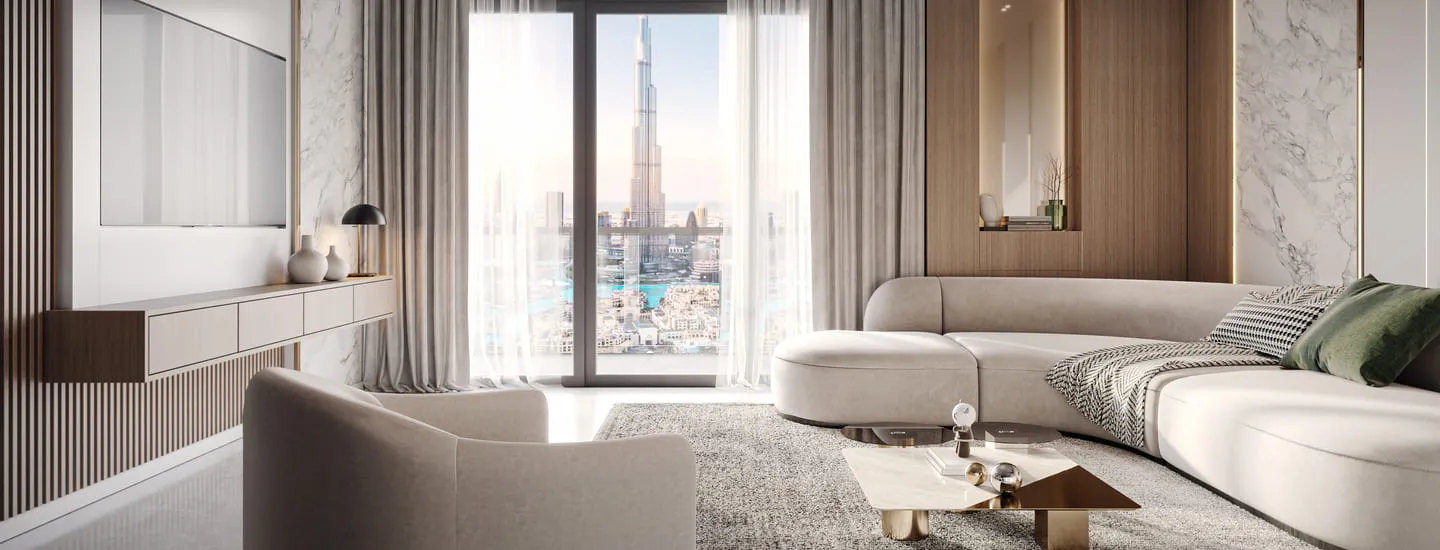
3D Living Room Rendering Tips
1. Focus on Lighting: Experiment with different lighting setups to see how they affect the mood and appearance of the living room.
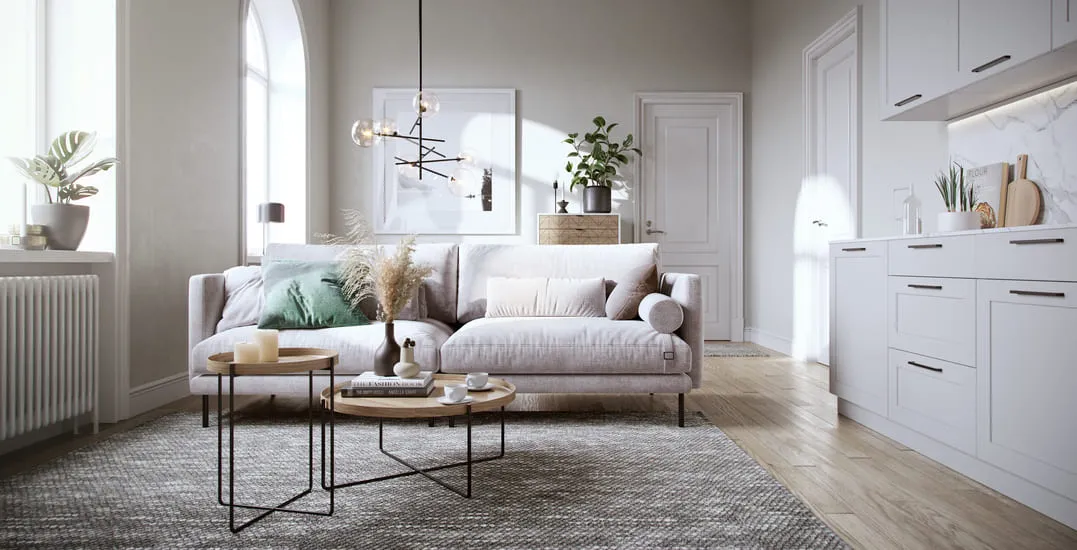
2. Use High-Quality Textures: To achieve a realistic look, ensure that textures and materials are of high quality. This includes everything from wall paint to upholstery.
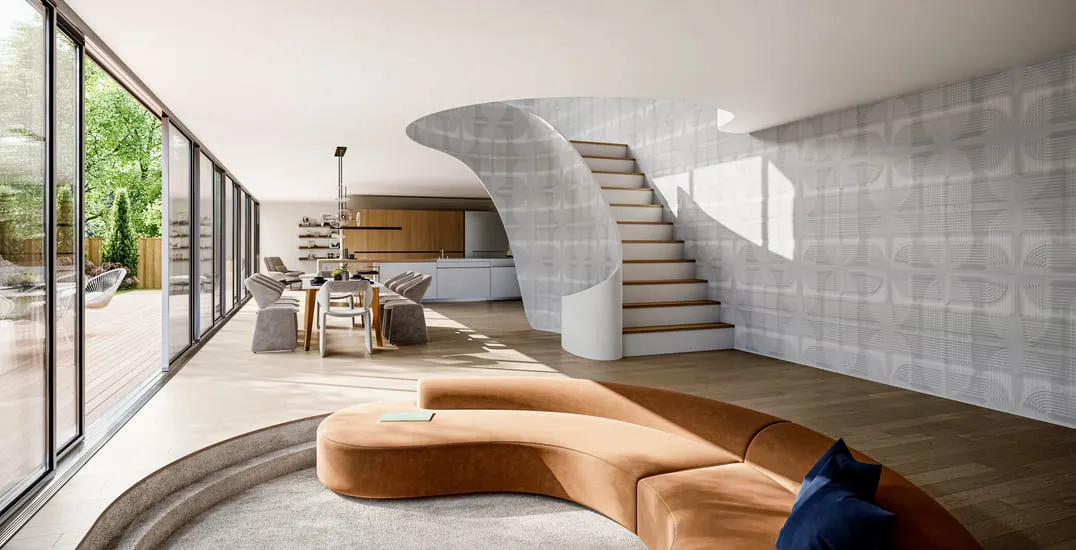
3. Incorporate Real-Life Elements: Add small details like books, plants, and accessories to make the rendering more relatable and lifelike.
4. Keep It Balanced: Avoid overcrowding the space with too much furniture or decor. Maintain a balance to ensure the room looks inviting and functional.
5. Experiment with Angles: Render the room from multiple angles to provide a comprehensive view. This helps in showcasing different aspects of the design.
Read also our guide on 3D rendering for lighting products.
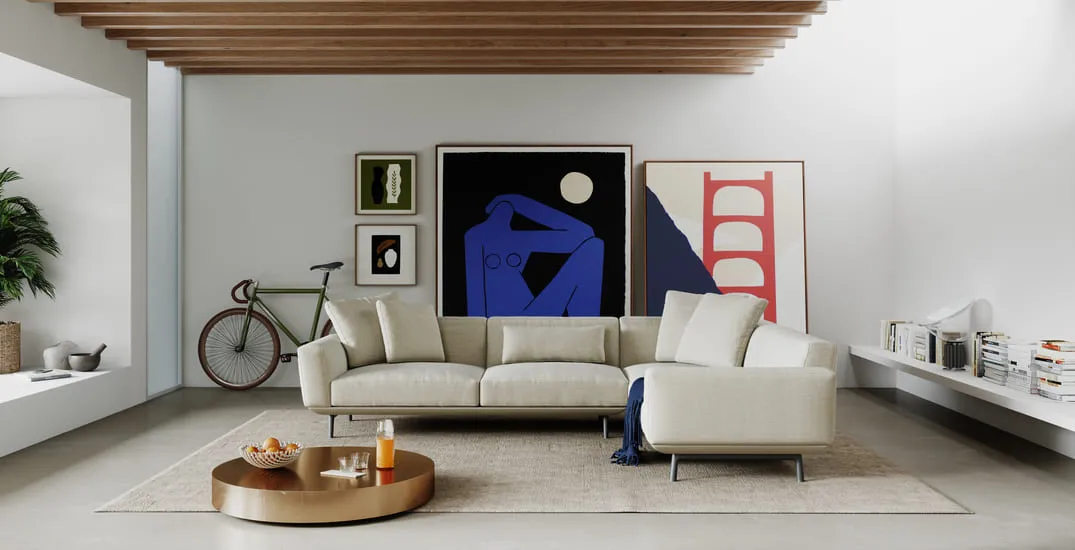
Why Choose Omegarender for Your Living Room 3D Rendering?
Omegarender stands out as a leader in the field of 3D rendering, offering unparalleled quality and expertise. Here’s why choosing Omegarender can make a significant difference in your living room design projects:
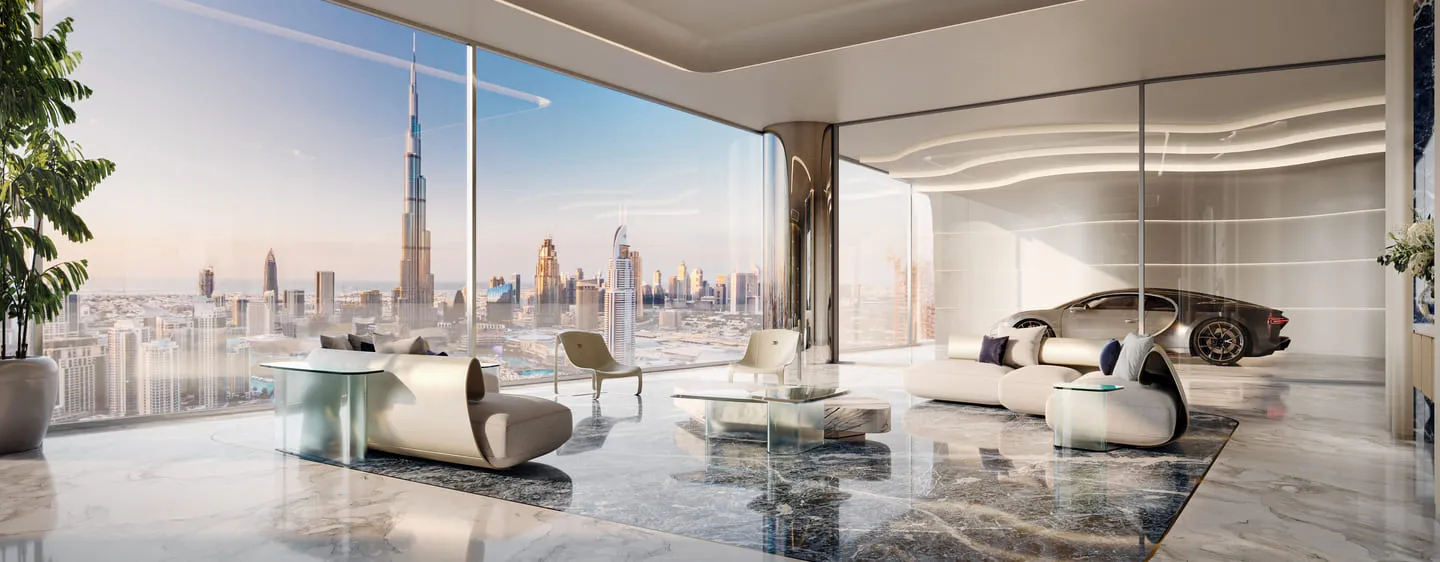
Photorealistic Quality
Omegarender delivers high-quality, photorealistic renderings that accurately depict design concepts. This attention to detail ensures that every element of the living room is showcased in the best possible light.
Versatility
Whether you’re an interior designer needing to present multiple design options or a real estate developer marketing a property, Omegarender’s services are tailored to meet diverse needs. Their ability to create detailed and accurate renderings at any stage of development provides a significant advantage. For specialized needs, explore our 3d furniture rendering services.
Fast Turnaround
In the fast-paced world of design and real estate, time is of the essence. Omegarender offers quick turnaround times for design changes and updates, ensuring that projects stay on schedule and clients are satisfied.
Client-Centric Approach
Omegarender prioritizes client satisfaction by offering customized solutions and attentive service. Their staff works closely with clients to fully grasp their vision and bring it to life with precision and creativity. For more comprehensive services, visit our 3D interior rendering services or explore how 3D bathroom rendering helps maintain the same level of material accuracy, lighting consistency, and design cohesion across private living spaces.
Conclusion
In the dynamic fields of interior design and real estate, 3D rendering has emerged as an indispensable tool for bringing living room designs to life. High-quality, photorealistic renderings not only enhance visualization but also streamline decision-making and marketing efforts. Omegarender excels in delivering top-notch 3D renderings with a client-centric approach, fast turnaround times, and unparalleled attention to detail. By choosing Omegarender, professionals can ensure their designs are showcased in the best possible light, ultimately achieving greater client satisfaction and project success. For more insights on the benefits, check out the advantages of 3d visualization.
Enhance your living room design projects with photorealistic 3D renderings from Omegarender. Contact us today to bring your vision to life with stunning detail and precision. Transform your concepts into vivid realities and see the difference that professional 3D rendering can make.
FAQ
How much does 3D living room rendering cost?
The complexity of the design, the level of detail required, and the turnaround time can affect the cost of 3D living room rendering. It's best to contact Omegarender directly for a personalized quote. For a detailed breakdown, refer to our 3d rendering cost.
What are the main elements of a 3D living room render?
The main elements of a 3D living room render include accurate modeling of the space, realistic textures and materials, proper lighting, detailed furniture and decor, and photorealistic rendering quality. Each of these components contributes to creating a lifelike and engaging visualization of the living room design.
How long does it take to complete a 3D living room render?
The time required to complete a 3D living room render can vary depending on the complexity of the project and the level of detail required. Typically, it can take anywhere from a few days to a couple of weeks. Omegarender provides fast turnaround times to ensure that projects stay on schedule.
Can I request changes after the initial render is completed?
Yes, Omegarender offers the flexibility to make changes after the initial render is completed. Their team works together with clients to ensure that the final render meets their expectations and requirements.
REVA SYKE RD, BRADFORD, UK
D3, DUBAI DESIGN DISTRICT,
DUBAI, UNITED ARAB EMIRATES


